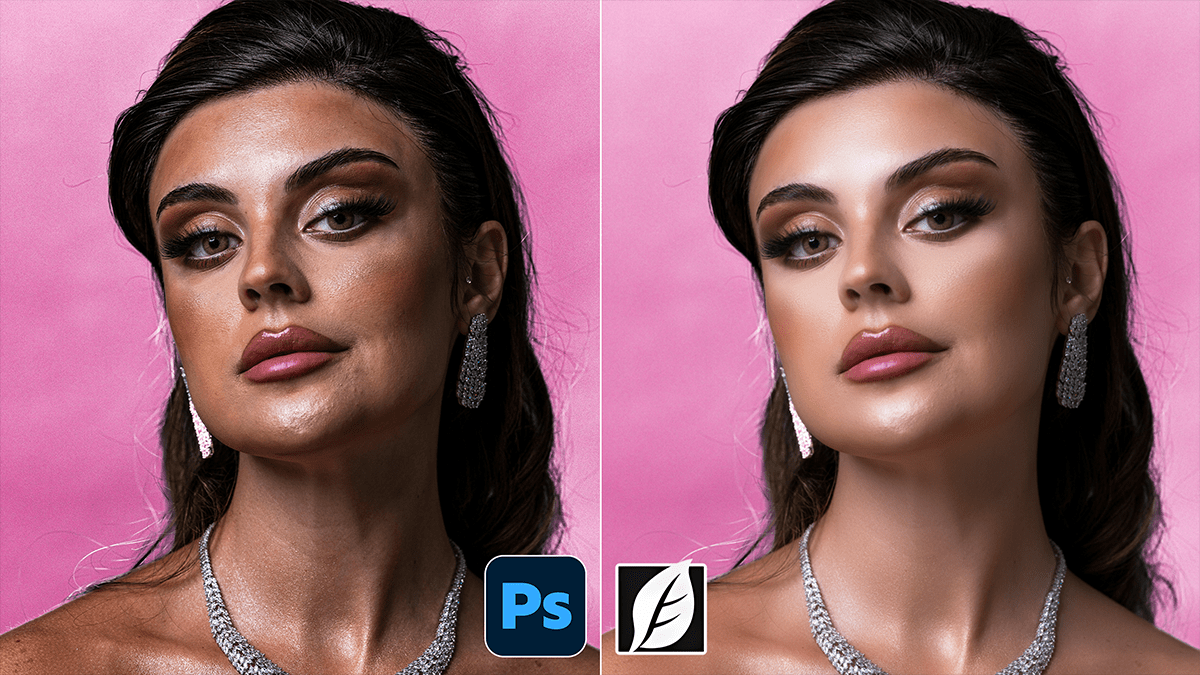
SkinFiner 5.7.1 Using Professional Skin Retouch in Photoshop CC,

Therefore, using SkinFiner as a professional Photoshop plugin is about more than just “smoothing”—it’s about preserving texture while automating the tedious parts of the job. For 2026, the latest versions (v5.8+) have significantly improved AI masking and 16-bit processing to ensure high-end results.
SkinFiner 5.7.1 Using Professional Skin Retouch in Photoshop CC
Here is the advanced workflow for a professional finish.
1. Advanced Setup (Smart Filtering)
Therefore, to maintain complete control over the edit, never apply the plugin directly to your background layer.
Duplicate & Convert: In other words, Press Ctrl + J (Win) or Cmd + J (Mac). Right-click the layer and select Convert to Smart Object.
Why? This allows you to double-click the “SkinFiner” label in your layers panel later to tweak your settings without losing your work.
Launch: Go to Filter > Photo-Toolbox > SkinFiner.
2. Master the Mask (The “AI” Advantage)
Therefore, SkinFiner 5.0+ uses AI-powered masks that are much more accurate than older versions.
Check the Mask: In other words, click the Mask icon (the person silhouette) to see what the software is targeting.
Exclude Features: Ensure the Auto-exclude facial features option is checked. This keeps the eyes, lips, and nostrils sharp while the skin is softened.
Fine-Tuning: If the mask is picking up hair or background, use the Mask Brush (with a minus sign) to paint those areas out.
SkinFiner 5.7.1 Using Professional Skin Retouch in Photoshop CC
3. Retouching with Texture Preservation
In other words, the “plastic” look happens when users push the sliders too far. Follow these “Pro” ratios:
Amount: Keep this between 40 and 65. 100 is almost always too much for a professional portrait.
The Detail Sliders:
Fine: Adjust this to manage the smallest pores.
Medium: This targets larger bumps and unevenness.
Coarse: Use this sparingly; it affects the overall “structure” of the face.
Pro Tip: If the skin looks too blurry, try moving the Fine slider into negative values—this actually sharpens the existing pores while the rest of the skin stays smooth.
4. Correcting “Botchiness” (Even Skin Tone)
However, this panel is often ignored, but it is the most powerful part of the plugin.
Redness/Yellow Sliders: Instead of reaching for a Hue/Saturation layer in Photoshop, use these sliders to neutralize “blotchy” red spots or yellow skin patches.
Eye-Bags: Use the Reduce Eye-bags slider (v5.1+) to brighten the under-eye area naturally. It mimics a subtle “Dodge and Burn” technique without the 20 minutes of manual work.
5. Final Output & Composite
However, before clicking “OK,” look at the Output settings at the bottom of the plugin:
SkinFiner 5.7.1 Using Professional Skin Retouch in Photoshop CC
Output to: Choose New Layer with Mask.
The Final Polish: However, back in Photoshop, if the effect still feels slightly heavy, lower the Opacity of the SkinFiner layer to 80%. This lets a tiny bit of the original, raw skin texture show through, making the edit look indistinguishable from a manual retouch.
Comparison: When to use which?
| Feature | Use Case |
| Plugin Mode | High-end individual portraits where you need Smart Filter control. |
| Standalone Mode | Batch processing 100+ photos (event photography, school portraits). |
| Neural Filters (AI) | Quick “social media” edits (faster but less precise than SkinFiner). |
Would you like me to create a step-by-step “Action” for you that combines SkinFiner with a final sharpening pass for a “High-Fashion” look?