Spot Healing Brush Tool Photoshop Tutorial,
Therefore, In this Photoshop tutorial, you learn, How to use the spot healing brush tool in Adobe Photoshop. In other words, Remove anything from an image using the spot healing brush tool. However, Basic to advanced learning is here.
For instance, The Spot Healing Brush Tool in Photoshop is a powerful and user-friendly tool designed for retouching and repairing photos. It is particularly effective for removing small blemishes, imperfections, or unwanted objects from an image with minimal effort. Here’s a detailed overview of how to use the Spot Healing Brush Tool and some tips to get the best results:

Using the Spot Healing Brush Tool:
- Above all, Select the Tool:
- Open your image in Photoshop.
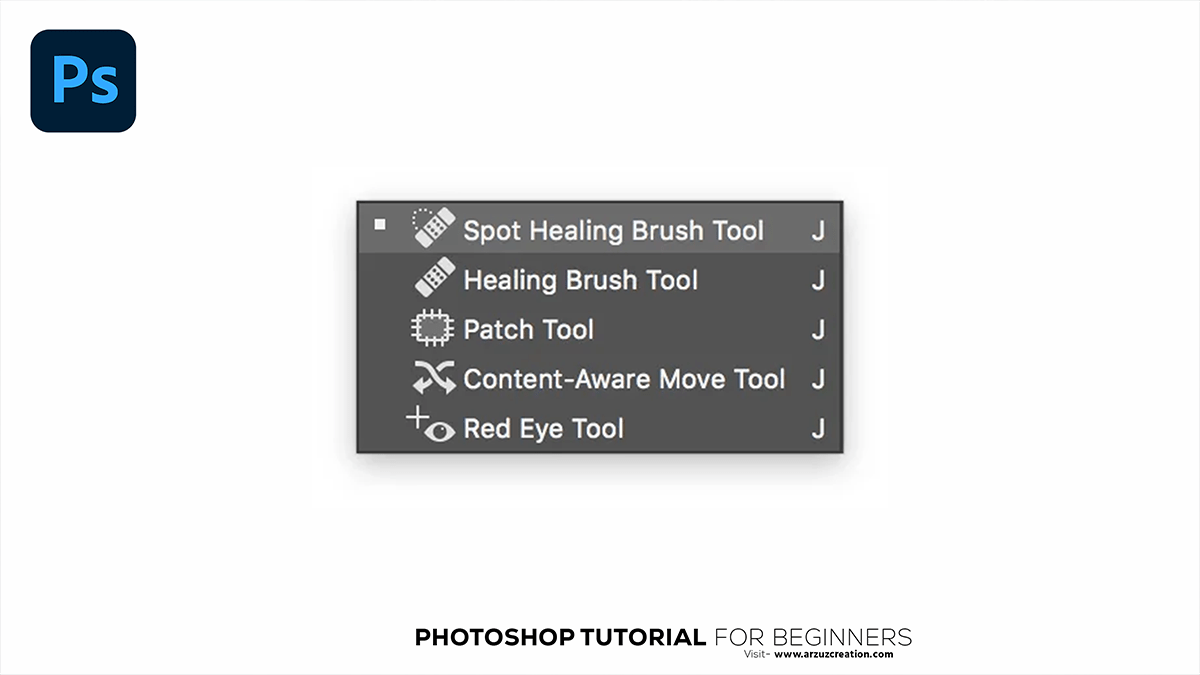
- Select the Spot Healing Tool from the toolbar on the left side of the screen. It looks like a Band-Aid with a dotted circle. You can also press the
Jkey on your keyboard to quickly select it.
- Adjust the Brush Size:
- Use the
[ ]bracket keys on your keyboard to adjust the brush size, or use the options in the top toolbar. - The brush size should be slightly larger than the blemish or area you want to fix.
- Choose a Mode:
- In the options bar at the top, you can choose from different modes:
- Content-Aware: Analyzes the surrounding pixels to repair blend seamlessly. This is usually the default and works well in most situations.
- Create Texture: Uses surrounding pixels to create a texture that matches the area being repaired.
- Proximity Match: Uses nearby pixels to fill in the selection.
- Apply the Tool:
- Simply click on the blemish or drag over the area you want to heal. The tool will automatically blend the area with the surrounding pixels.

Tips for Best Results:
- Use Small Strokes: For best results, especially on complex backgrounds, use small, controlled strokes rather than trying to cover large areas at once.
- Zoom In: Zoom in to the area you’re working on to get more precise control.
- Work on a Duplicate Layer: To preserve the original image, create a duplicate layer before using the Healing Brush Tool. This allows you to make non-destructive edits.
- To duplicate the layer, right-click on the layer in the Layers panel and select “Duplicate Layer,” or press
Ctrl + J(Windows) /Cmd + J(Mac). - Check the Result: After applying the tool, zoom out to check how the edits blend with the entire image. Sometimes minor adjustments might be needed.
- Use with Other Healing Tools: For more complex edits, you can use the Healing Brush Tool in combination with other healing tools like the Brush Tool, Patch Tool, or Clone Stamp Tool for better results.
- Blend Modes: Experiment with different blend modes in the options bar to see how they affect the repair. For example, the “Lighten” mode can be effective for removing dark spots on lighter backgrounds.
- Sample All Layers: If you are working with multiple layers, check the “Sample All Layers” option in the options bar to ensure the tool samples pixels from all visible layers.
By following these steps and tips, you can effectively use the Brush Tool to clean up and enhance your photos, making unwanted blemishes and distractions disappear seamlessly.
