Photoshop Editing & Adobe Camera Raw Preset,
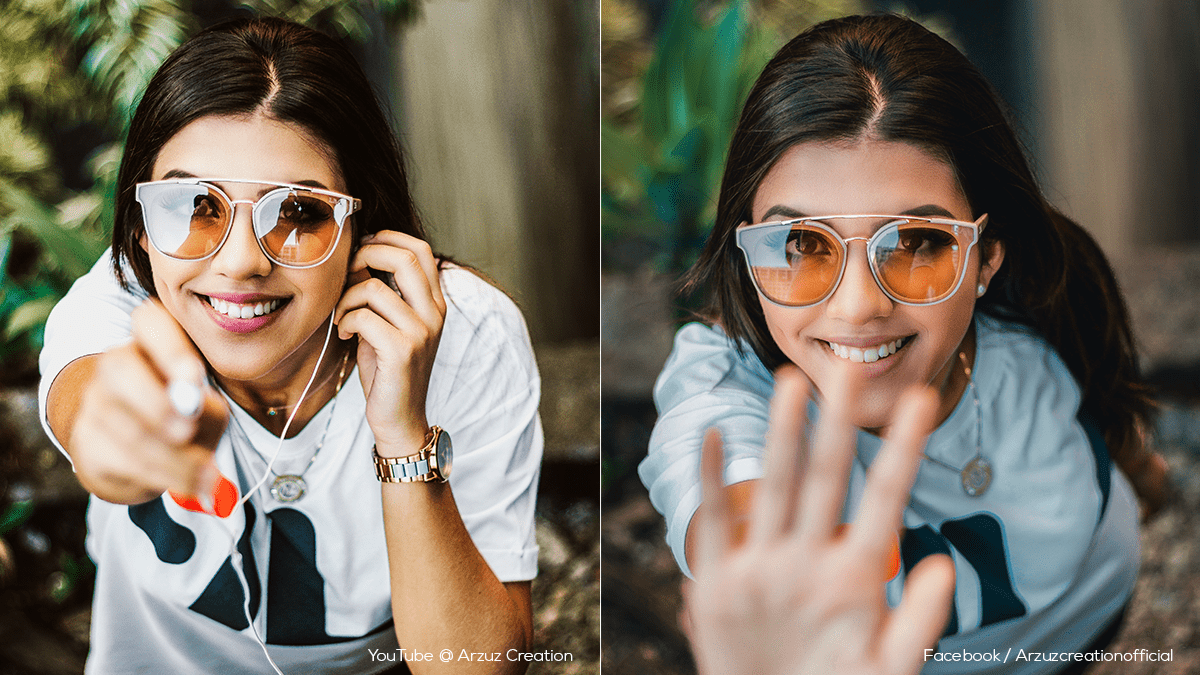
Photoshop Editing: In today’s Photoshop tutorial, I will share professional Adobe camera raw presets with you. However, In this Photoshop tutorial, you will learn and know how to use 1000 Plus Photoshop Editing camera raw presets.
Secondly, We will see how we can do professional photo editing with Adobe Camera Raw Filters and use presets for photo editing.

1000 Plus Preset । How to Use Camera Raw Preset Using Adobe Camera Raw Filter 2023
Firstly, Today I am going to share with you 1000 plus presets that you can use for your portrait photos and even your landscape photo editing.
However, You can do photo editing in a very beautiful way using this Photoshop camera raw presets.


আজকের এই ফটোশপ টিউটোরিয়ালে আমি আপনাদের সাথে শেয়ার করবো পেশাদার অ্যাডোবি ক্যামেরার রও প্রিসেট। এই ফটোশপ টিউটোরিয়ালে, আপনি শিখবেন এবং জানবেন কিভাবে ১০০০ প্লাস ফটোশপ এডিটিং ক্যামেরা রও প্রিসেট ব্যবহার করতে হয় যে কোন প্রোট্রেট ছবিতে।
আমরা দেখাবো কিভাবে আমরা অ্যাডোবি ক্যামেরার রও ফিল্টার দিয়ে প্রফেশনাল ফটো এডিটিং করতে পারি এবং ফটো এডিটিং এর জন্য প্রিসেট ব্যবহার করতে পারি খুব সহজে।
আমরা কিভাবে এডোবি ক্যামেরা রও ফিল্টার দিয়ে প্রফেশনাল ফটো এডিটিং করতে পারি এবং কিভাবে আমরা প্রিসেট ব্যবহার করতে পারি ফটো এডিটিং করার জন্য সেই তা দেখবো।
আজ আমি তোমাদের সাথে যে ১০০০ প্লাস প্রিসেট শেয়ার করতে যাচ্ছি, তোমার তোমাদের পোর্ট্রেট ফটো এমনকি তোমাদের ল্যান্ডস্ক্যাপে ফটো এডিটিং এর কাজে ব্যবহার করতে পারবে।
খুব সুন্দর ভাবে ফটো এডিটিং করতে পারবে আমার এই ফটোশপ ক্যামেরা রও প্রিসেট গুলো ব্যবহার করে।
Photoshop Editing Preset, Adobe Camera Raw Filter

In today’s Adobe Photoshop tutorial, I will share with you the Dark Orange Photo Editing Adobe camera raw preset. Firstly, You can use these Photoshop camera raw presets on your photos to give a Dark Orange photo look. Secondly, this Dark Orange photo looks very beautiful.
আজকের এডোবি ফটোশপ টিউটোরিয়ালে আমি আপনাদের সাথে ডার্ক অরেঞ্জ ফটো এডিটিং এডোবি ক্যামেরার রও প্রিসেট শেয়ার করব। আপনি একটি গাঢ় কমলা ছবির চেহারা দিতে আপনার ফটোতে এই ফটোশপ ক্যামেরা রও প্রিসেট ব্যবহার করতে পারেন।
How to Install Color Lookup Presets in Photoshop 2023

Firstly, In today’s Photoshop tutorial, I will show you how to install Photoshop Color Lookup Presets in Adobe Photoshop software. Secondly, I will show you step-by-step How to Install Color Lookup Preset.
However, We use Photoshop various options or tools for professional photo editing, color lookup is one of them. Most importantly, Photo editing requires knowing how to use color lookup.
আজকের এই ফটোশপ টিউটোরিয়ালে আমি তোমাদের দেখাবো কিভাবে ফটোশপ কালার লুকআপ প্রিসেট ইনস্টল করতে হয় এডোবি ফটোশপ সফটওয়্যার। কালার লুকআপ প্রিসেট ইনস্টল আমি তোমাদের ধাপে ধাপে দেখিয়ে দেব।
আমরা প্রফেশনাল ফটো এডিটিং করার জন্য ফটোশপ বিভিন্ন অপসন বা টুল ব্যবহার করে থাকি , তার ভেতর কালার লুকআপ এই টি একটি অপসন। ফটো এডিটং করার জন্য কালার লুকআপ এর ব্যবহার জানা প্রয়োজন।
Color Lookup Photoshop Download
1700 Plus Photoshop Color Lookup Presets Free Download

১৭০০ প্লাস ফটোশপ কালার লুকআপ প্রিসেট বিনামূল্যে ডাউনলোড করুন। এইটি একটি ফটোশপ কালার লুকআপ প্রিসেট টিউটোরিয়াল।


এই ভিডিওতে, আমি ব্যাখ্যা করেছি কিভাবে আমরা এডোবি ফটোশপ সিসি ২০২৩ এ কালার লুকআপ প্রিসেট ইনস্টল করবো। আপনারা কীভাবে কালার লুকআপ প্রিসেট ব্যবহার করবেন এবং আপনার বিরক্তিকর ফটোগুলিকে নজরকাড়া ফটোতে পরিণত করবেন।
এই ১৭০০ প্লাস প্রিসেট গুলি আপনার ফটোগ্রাফকে জাদুর রং করবে মাত্র এক ক্লিকে। আপনি চাইলে আপনার প্রোফাইল ছবি, ইনস্টাগ্রাম ছবি বা আরও অনেক ছবির জন্য এইগুলো ব্যবহার করতে পারেন। ডাউনলোড লিঙ্ক ভিডিও বিবরণ দেওয়া আছে। ধন্যবাদ সবাইকে।


1700 Plus Photoshop Color Lookup Presets Free Download. This is a Photoshop tutorial. Moreover, Color Lookup Preset.
Firstly, In this video, I explain how to install presets for Adobe Photoshop CC 2023 Color Lookup. Secondly, How to use Color Lookup and turn your boring photos into eye-catching photos.


Thirdly, These 1700+ presets are just a click away from magic to your photographs. However, You can use it for your profile picture, Instagram picture, or more. Moreover, The download link is given in the video description. Thanks, everyone.
Color Lookup (3D Lut Presets For Photoshop – Free Download)
Photoshop Photo Editing । Photoshop Presets

Firstly, In This Photoshop Tutorial, You Learn, How to edit your portrait photo in Photoshop. Moreover, Photoshop photo editing.
এই ফটোশপ টিউটোরিয়ালে, আপনি শিখবেন, ফটোশপে কীভাবে আপনার প্রতিকৃতি ফটো সম্পাদনা করবেন। ফটোশপ ফটো এডিটিং।


55+ Photoshop Color Lookup Presets Free Download
Firstly, In this video, I explain how to install presets for Adobe Photoshop CC 2023 Color Lookup. Secondly, How to use Color Lookup and turn your boring photos into eye-catching photos.
Above all, These 55+ presets are just one click of magic to your photographs. For instance, You can use it for your profile picture, Instagram picture, or more. After that, The download link is given in the video description. Thanks, everyone.

৫৫ প্লাস ফটোশপ কালার লুকআপ প্রিসেট বিনামূল্যে ডাউনলোড করুন। ফটোশপ টিউটোরিয়াল। কালার লুকআপ প্রিসেট।
এই ভিডিওতে, আমি ব্যাখ্যা করেছি কিভাবে এডোবি ফটোশপ সিসি ২০২৩ কালার লুকআপ প্রিসেট ইনস্টল করতে হয়। কীভাবে আপনি কালার লুকআপ ব্যবহার করবেন এবং আপনার বিরক্তিকর ফটোগুলিকে নজরকাড়া ফটোতে পরিণত করবেন।
এই ৫৫ প্লাস প্রিসেটগুলি আপনার ফটোগ্রাফ কে একটি মাত্র জাদুর ক্লিকে পরিবর্তন করে দিবে। আপনি চাইলে আপনার প্রোফাইল ছবি, ইনস্টাগ্রাম ছবি বা আরও অনেক অন্যান্য ছবির জন্য এই গুলো ব্যবহার করতে পারেন। ডাউনলোড লিঙ্ক এইখানে এবং ভিডিও বিবরণ দেওয়া আছে। ধন্যবাদ সবাইকে।
Skin Retouching । How to Smooth & Soften Skin

Skin retouch. Learn professional skin retouching with Adobe Photoshop 2023 Version
Remove all skin blemishes and even bring back beautiful and natural skin tones using some Photoshop tools. You don’t need to be an expert in Photoshop’s advanced labels to do this. You can do this with just a few tools.
In today’s Photoshop tutorial, I will show you how you can use Adobe Photoshop 2023 to transform rough skin in your portrait photos into smooth skin. We will learn to do this using various Photoshop tools. We can easily remove any blemishes on the face using the Healing Brush tool from the Photoshop toolbar.
In addition to the Healing Brush tool, we will learn how to use the Spot Healing Brush tool to remove blemishes and acne on the face. Then using the patch tool we will learn step by step how to remove blemishes and clean the face.

Then, we’ll learn step-by-step how to smooth and soften the skin without blurring important details such as the person’s eyes, hair, etc., and keep the texture of the skin as good as possible. Click here to take a professional photo editing course with Adobe Photoshop 2023.
I used the latest version of Photoshop Adobe Photoshop CC 2023 to create this skin retouch tutorial. Visit here to download the latest version of Photoshop.

How to Smooth Skin in Photoshop
Step One: Create a duplicate layer
To duplicate the image layer we can press (Ctrl + J) from the keyboard. Or, Drag the image layer to the create new layer icon and release the duplicate layer as a new layer. While creating the layer, name the layer Spot Remove from Face.
Step Two: Select the Spot Healing Brush tool from the Photoshop toolbar
We will select the spot healing brush tool from the Photoshop toolbar and then select Content Aware from the top option and then remove the spots from the face.
Step Three: Now we will duplicate the spot removed from the face layer again
Name the new duplicated layer Smooth Skin. Now the work that we will do for smooth skin will be in this newly created layer.


Step Four: Now we will go to the filter option from the menu bar
We will click on the filter option from the menu bar and then open the high pass filter from the other at the bottom.
Step Five: A high pass radius value of 20 gives the best results with my portrait photos. Choose the radius value according to your portrait photo.
I have posted this tutorial in video form on my YouTube channel Arzuz Creations. You can watch the video if you want. Hope you can learn smooth skin & skin retouching by watching the video.
How to Skin Retouch With Photoshop Action

Photoshop Action File Free Download 2023 । Photoshop Editing
Professional skin retouching with just one click using Adobe Photoshop Actions.
Firstly, Today I am going to share with you a skin-retouching Photoshop action file that can easily smooth your portrait photos using action files. Watch this tutorial video by clicking here.

With today’s Photoshop action file, you can smooth the sass, whiten the teeth, and sharpen the eyes. Therefore, Professional photo editing can be done using this Photoshop action file. Download this action file and click here.

Firstly, Download these Photoshop actions for your portrait photo skin retouching. However, Using this Photoshop action file will save you a lot of skin retouching and time. This is often required when we are doing portrait photo skin retouching work.
Because skin retouching requires a lot of work on a photo. For example: Removing face spots, changing eye color, changing hair color, lip color, skin texture, skin sharpening, dodging, and burning are many things to do.


If we can do these tasks very easily and even in a very short time using only one Photoshop action file, then we will have a lot less professional portrait skin retouching and time.
For instance, I am going to share with you today a professional portrait skin retouch Photoshop action that will allow you to do the above tasks very easily and in a very short time. After that, If you like my Photoshop tutorial please comment. Thanks, everyone.
How to Retouch Skin Using Frequency Separation

Hello Everyone, In this Photoshop tutorial, You learn HOW to RETOUCH SKIN using FREQUENCY SEPARATION in Photoshop 2023. How to Skin Retouch in Photoshop 2023 with Action, a straightforward tutorial for beginners on How to Skin Retouch Frequency Separation with Action in Photoshop 2023.

Adobe Photoshop CC 2023, 2022 is an excellent photo editing software for beginners and skin retouching.

Firstly, We take a look at how to skin retouch, remove blemishes, frequency separation, dodge and burn, and smooth skin in Photoshop 2023
Secondly, You will get the file password on the video screen. Please watch the full video without dragging the video you will get the password. Do not post any password in the comment section otherwise the comment will be deleted. Thanks, everyone.
