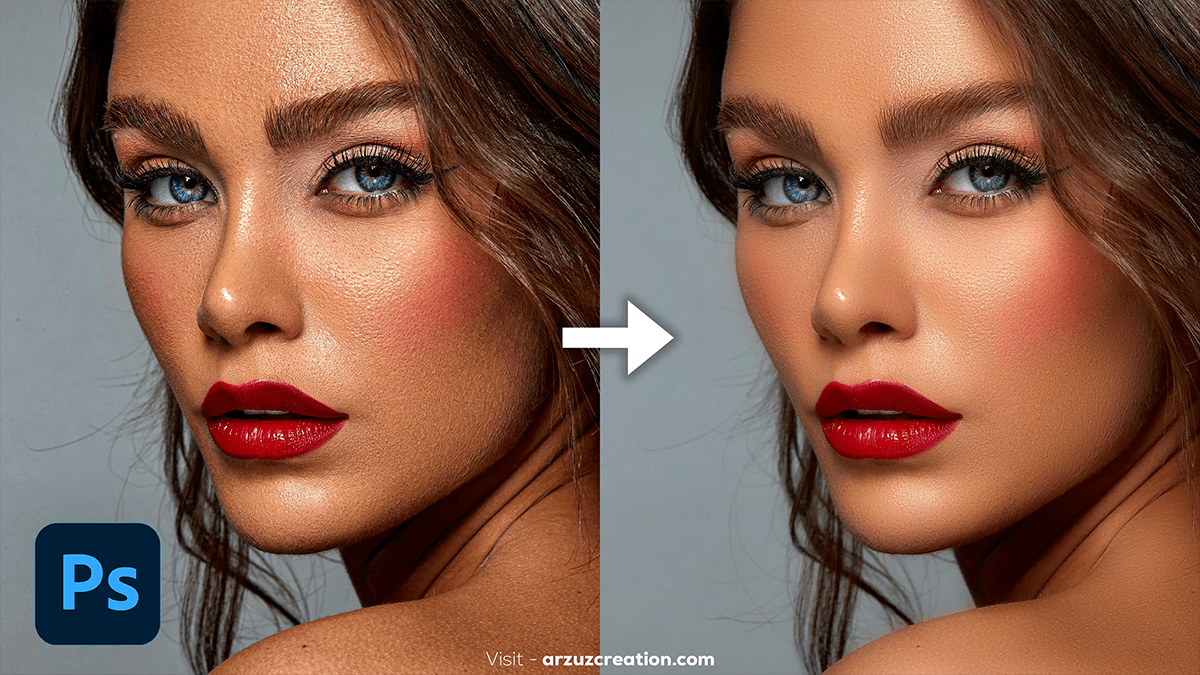
How to Smooth Photo in Adobe Photoshop CC,

Therefore, To smooth a photo in Adobe Photoshop CC, you can use several methods depending on the specific effect you want. In other words, Here’s a basic guide using the Gaussian Blur and Surface Blur methods:
Method 1: How to Smooth Photo, Using Gaussian Blur,
Open Your Image: However, Open your image in Adobe Photoshop CC.
Duplicate the Layer: For instance, Right-click on your Background layer in the Layers panel and select Duplicate Layer.... This preserves the original image.
Apply Gaussian Blur:
- Go to
Filter > Blur > Gaussian Blur. - Adjust the
Radiusslider to increase or decrease the blur effect. Typically, a radius between 2-5 pixels works well for a subtle smoothing effect. - Click
OK.
Create a Layer Mask:
- Above all, Select the blurred layer.
- Click the
Add Layer Maskbutton at the bottom of the Layers panel.
Refine the Effect:
- Select the Brush Tool (
B). - Set the Foreground color to black.
- Use a soft brush to paint over the areas where you want to reduce the smoothing effect (e.g., eyes, mouth, and other details).
- Adjust the brush opacity for a more gradual effect.
How to Smooth Photo in Adobe Photoshop CC,
Method 2: Using Surface Blur,
Duplicate the Layer: In addition, Just as in the first method, duplicate your Background layer.
Apply Surface Blur:
- After that, Go to
Filter > Blur > Surface Blur. - Similarly, Adjust the
RadiusandThresholdsliders to control the amount of blur and how it applies to the image. A higher Threshold will preserve more detail. - Click
OK.
Fine-tune the Effect: Therefore, If the effect is too strong, reduce the layer’s opacity or use a layer mask to paint over areas where you want to bring back detail.

Method 3: Using the Smudge Tool,
Select the Smudge Tool:
- Select the Smudge Tool from the toolbar (or press
Ron the keyboard). - Set the Strength to a low value (e.g., 10-20%).
Smooth Out Areas:
- Gently drag over areas of the skin or other parts of the image that you want to smooth. The Smudge Tool pushes the pixels around, blending them into each other.
Build Up the Effect: Continue working over the areas, building up the effect gradually for a natural look.
Final Tips:
- Preserve Details: Be cautious with smoothing, as overdoing it can make the image look unnatural. Focus on areas like skin, while keeping details like eyes, lips, and hair sharp.
- Zoom In/Out: Frequently zoom in and out to see how the effect looks at different sizes.
- Blend Modes: Experiment with different blend modes (e.g.,
OverlayorSoft Light) on your smoothing layers for more subtle effects.
These methods should give you a good start on smoothing photos in Photoshop CC!