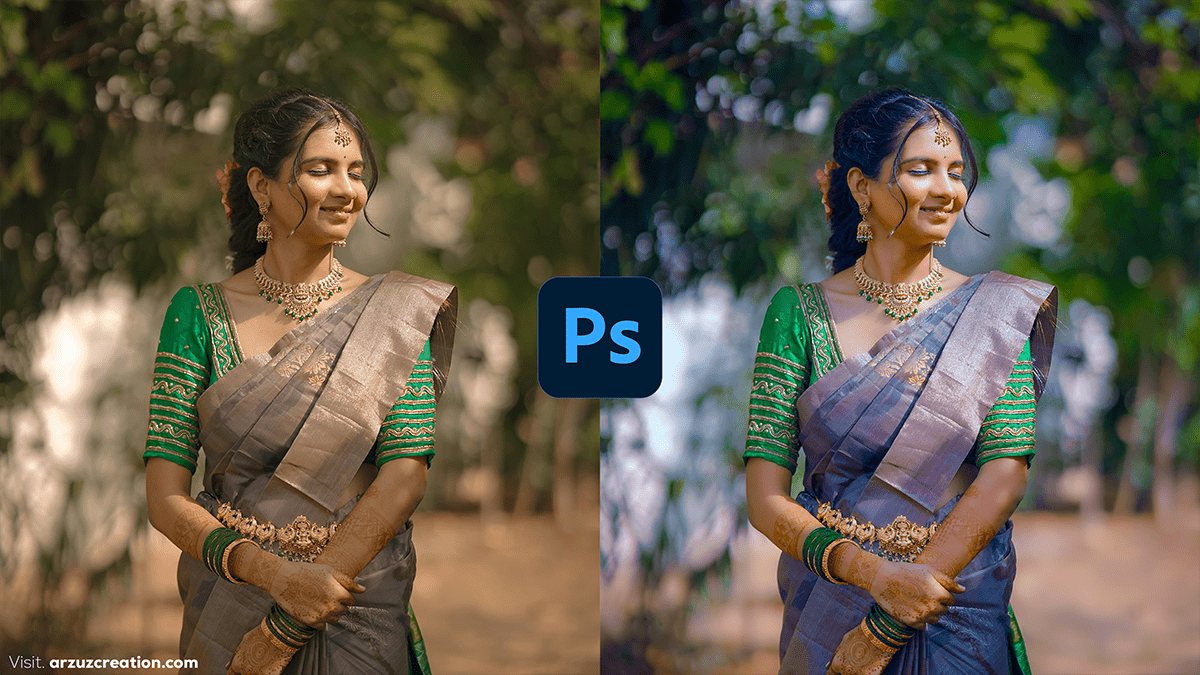
Adobe Photoshop: Wedding Image Color Grading Tutorial,

Therefore, Color grading in Photoshop for wedding photos can dramatically enhance the mood and feel of the images. In other words, Here’s a step-by-step guide to creating a beautiful color grade:
Open Your Photo in Photoshop:
- However, Start by opening your wedding photo in Photoshop by going to
File > Open.
Add an Adjustment Layer:
- For instance, Go to the
Layerspanel and click on theAdjustment Layericon at the bottom. Start with theCurvesadjustment to fine-tune the contrast and lighting. You can adjust the curves for RGB channels or individual Red, Green, and Blue channels.
Color Balance Adjustment:
- However, Add a
Color Balanceadjustment layer by going toLayer > New Adjustment Layer > Color Balance. - For instance, Adjust the mid-tones, shadows, and highlights individually:
- Shadows: Add a cooler tone (slightly push cyan or blue).
- Midtones: Add warm colors (yellow or red) to enhance skin tones.
- Highlights: Add warmth or coolness depending on the desired mood.
Adobe Photoshop: Wedding Image, Selective Color Adjustment:
- Above all, Go to
Layer > New Adjustment Layer > Selective Color. This targets specific color ranges (whites, neutrals, and blacks). - In addition, Enhancing the whites (dress) and skin tones (reds, yellows) for wedding photos often makes the subject pop. You can tweak each color group to highlight subtle hues in the environment or clothes.
Hue/Saturation Adjustment:
- Above all, Use the
Hue/Saturationadjustment layer to boost or reduce the saturation of certain colors. - In addition, You can adjust overall saturation or target specific colors (like greens in foliage, blues in skies, etc.). Keep skin tones natural by reducing any extreme saturation on reds.
Adobe Photoshop: Wedding Image Color Grading Tutorial,
Gradient Map:
- In addition, Add a
Gradient Mapadjustment layer for creative color grading. Select a preset gradient or create a custom one. Use a gradient that matches the desired tone (for example, a warm-to-cool gradient can give a nice split-tone effect). - After that, Lower the opacity of the Gradient Map layer to blend it naturally into the photo.
Final Touches with Camera Raw Filter:
- After that, Once the layers are set, convert your image to a Smart Object (right-click on the layers >
Convert to Smart Object), then go toFilter > Camera Raw Filter. - Similarly, Fine-tune the exposure, contrast, highlights, shadows, whites, and blacks. You can also adjust clarity and dehaze for a dreamy look.
- In other words, Use the
Split ToningorColor Gradingpanels to add warmth to the highlights and cool tones to the shadows.
Adobe Photoshop: Wedding Image, Dodge and Burn (Optional):
- In addition, Create a new layer, set its blending mode to, and paint with a soft white brush (to dodge) or black brush (to burn) to enhance highlights and shadows selectively. This can add depth and dimension to the photo.
Check Skin Tones:
- Similarly, Pay attention to the skin tones throughout the process. Wedding photos usually focus on natural, warm skin tones, so make sure they don’t become too red or overly desaturated.
Adobe Photoshop: Wedding Image, Save Your Graded Image:
- Therefore, Once you’re happy with the look, save the image by going to
File > Save As.
By following these steps, you can create beautiful, emotional, and cinematic color grades for wedding photos.
Would you like to try a specific look, like warm vintage or soft pastels?
