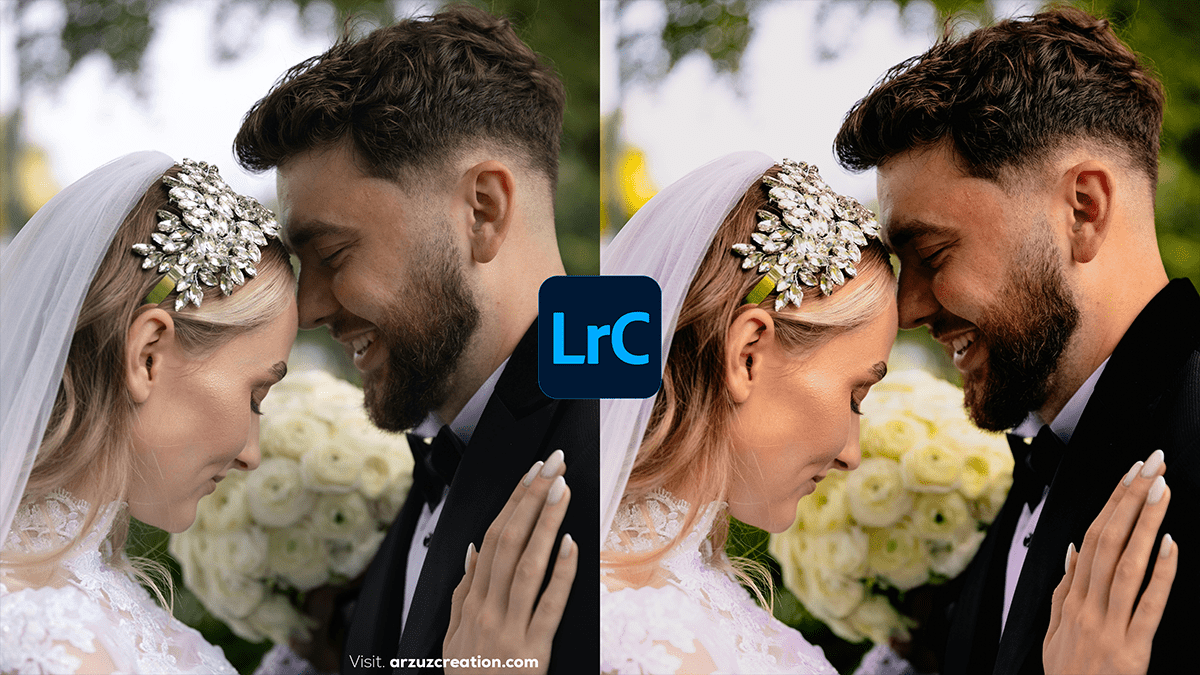
Lr Photo Editing: Wedding Portrait Photo Color Grading Lightroom,

Color grading wedding photos in Lightroom can enhance the mood and aesthetic of the images while maintaining a timeless, romantic feel. In other words, Here’s a step–by–step guide to achieving beautiful color grading for wedding photos in Lightroom:
Basic Adjustments First:
- Exposure & Contrast: Make sure the exposure is correct and adjust the contrast for clarity.
- White Balance: Adjust the white balance to get accurate skin tones. Wedding photos often benefit from a slightly warm tone (higher temperature).
- Highlights & Shadows: Reduce highlights to recover detail in bright areas (like a wedding dress), and lift shadows to bring out detail in darker areas.
- Whites & Blacks: Adjust whites to add brightness, and increase blacks slightly for depth.
Lr Photo Editing: Wedding Portrait, Tone Curve:
- Create an S-Curve: However, Adjust the tone curve to create an “S” shape. This will add contrast and pop to the image, while also giving you control over specific tonal ranges.
- Highlights: Slightly pull down to soften.
- Shadows: Slightly lift to retain details in darker areas.
- Therefore, For a vintage or soft look, you can raise the blacks and lower the whites.
HSL (Hue, Saturation, Luminance) Panel:
- Adjust Skin Tones: In the HSL panel, you can fine-tune the reds, oranges, and yellows.
- Hue: Adjust to ensure natural skin tones.
- Saturation: Lower or increase saturation to make sure colors pop without looking unnatural.
- Luminance: Increasing luminance can brighten skin tones, which is especially useful for flattering portraits.
- Boost Wedding Colors: Often, you’ll want to make the bride’s dress, flowers, or greenery pop. Adjust hues for colors like greens and purples for flowers or landscapes. Decrease saturation for distracting background colors.
Split Toning (or Color Grading Panel in Latest Versions):
- Warm Highlights: Apply warm tones (orange or yellow) to the highlights to give the image a golden, romantic glow.
- Cool Shadows: Apply cooler tones (blue or teal) to the shadows for contrast, which helps balance the warmth.
- Midtones: In the color grading panel (available in newer versions of Lightroom), you can also target midtones. Consider adding a slight warm tint here to harmonize the overall tone.
- Blend and Balance: Adjust the balance slider to shift how much of the warmth or coolness you want to influence the image.
Lr Photo Editing: Wedding Portrait Photo Color Grading Lightroom,

Vignette:
- In other words, Add a slight vignette to focus attention on the couple. Don’t overdo it—just a subtle vignette can add a classic, elegant touch.
Lr Photo Editing: Wedding Portrait, Final Touches:
- Sharpening: Use the sharpening tool for added clarity.
- Noise Reduction: If the photo was taken in low light, especially during evening or indoor receptions, use noise reduction to smooth out any grain.
- Calibration Panel: The calibration panel can give a subtle color shift that affects the overall look. You can play with the red, green, and blue primaries to give a unique tint or balance the color harmonies.
Presets:
- Therefore, Use presets as a starting point for color grading. Many Lightroom presets are specifically designed for wedding photos and can help achieve a desired look more quickly. After applying a preset, tweak the settings to personalize the image.
This process ensures that your wedding photos have that dreamy, timeless feel that enhances the overall aesthetic.
