Adobe Photoshop 2026: Levels Using Outdoor Photo Editing,

Therefore, using the Levels tool is one of the most effective ways to fix exposure, add “pop,” and correct color in outdoor photography. Because outdoor lighting is often unpredictable—ranging from harsh midday sun to flat, overcast skies—Levels provides the precision needed to balance the histogram.
Adobe Photoshop 2026: Levels Using Outdoor Photo Editing,
In other words, here is a guide on how to use Levels specifically for outdoor editing.
1. Setting Up: The Non-Destructive Way:
Therefore, always use an Adjustment Layer instead of the top menu’s Image > Adjustments. This allows you to go back and change your settings later without damaging the original pixels.
Therefore, Go to the Layers Panel.
In other words, click the Create new fill or adjustment layer icon (the half-filled circle).
Therefore, Select Levels.
Adobe Photoshop 2026: Levels Using Outdoor Photo Editing,
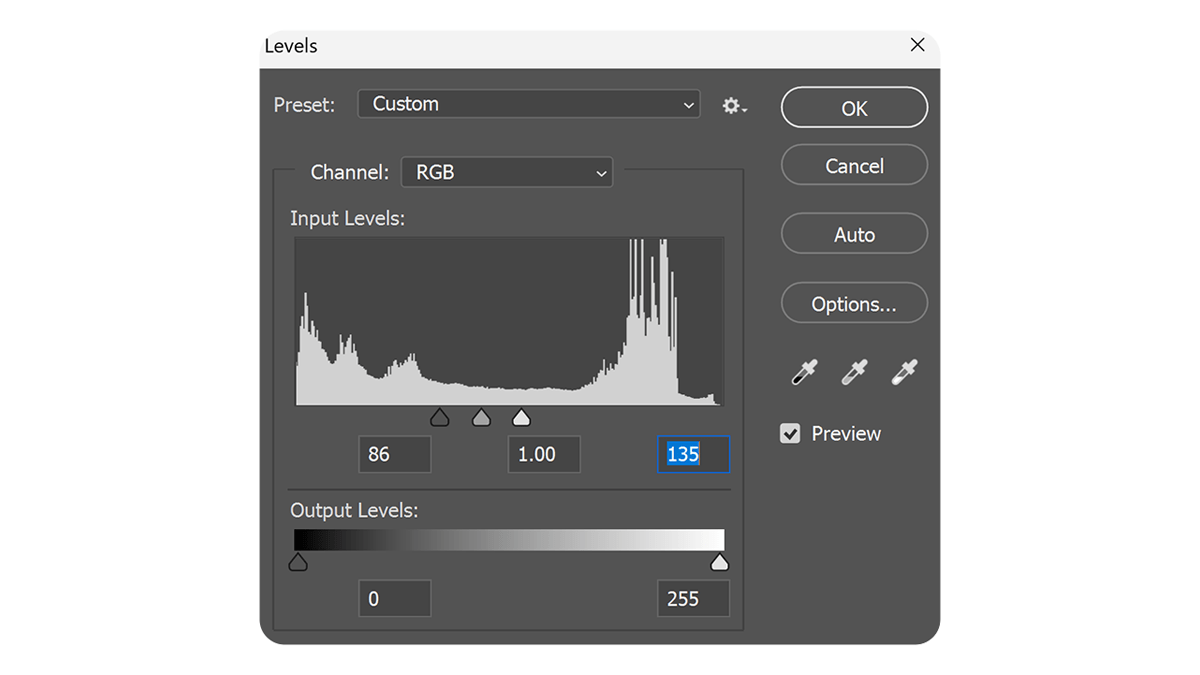
2. Reading the Histogram:
Therefore, the histogram is a “map” of your photo’s light.
Left side: Shadows (black).
Middle: Midtones (gamma).
Right side: Highlights (white).
Common Outdoor Scenarios:
Flat/Overcast Sky: In other words, the histogram will look like a “mountain” in the middle with space on the left and right. This causes the photo to look grey and dull.
Harsh Sunlight: In other words, the histogram will have spikes touching both the far left and far right edges, often meaning your highlights are “clipped” (pure white with no detail).
Adobe Photoshop 2026: Levels Using Outdoor Photo Editing,
3. The “Standard” Outdoor Correction:
In other words, to make an outdoor photo look crisp and professional, follow these three steps in the Properties Panel:
Step 1: Set the Black and White Points:
However, drag the Black Slider (left) to the right until it touches the start of the “mountain” of data. Then, drag the White Slider (right) to the left until it touches the other side.
Pro Tip: However, hold down the Alt/Option key while dragging. The screen will turn black (for highlights) or white (for shadows). The moment you see colors “peeking through,” you have reached the point where you are starting to lose detail. Stop just before that.
Step 2: Adjust the Midtones (The “Pop”)
However, the Middle Slider (grey) controls the overall brightness of your subject without affecting the absolute blacks or whites.
Move Left: Brightens the image (great for brightening a subject in the shade).
Move Right: Darkens the image (useful for adding mood or richness to a sunset).
Step 3: Fix Color Casts:
However, Outdoor photos often have a blue tint (from the sky) or a green tint (from foliage).
Above all, in the Levels properties, change the dropdown from RGB to a specific color (e.g., Blue).
Above all, adjusting the sliders here will shift the color balance. For example, moving the blue midtone slider to the right will add yellow, warming up a cold-looking landscape.
Adobe Photoshop 2026: Levels Using Outdoor Photo Editing,
4. Local Adjustments with Masks:
Above all, Outdoor photos often have a bright sky and a dark foreground. One level’s adjustment might not fix both.
- Above all, apply a Levels adjustment to make the foreground look perfect.
- In addition, select the Layer Mask (the white box next to the Levels layer).
- Above all, use a Black Brush (or a Gradient tool) to paint over the sky. This “hides” the adjustment from the sky, keeping it from blowing out while the ground stays bright.
Summary Table: Levels for Outdoor Lighting:
| Lighting Condition | Levels Goal | Action |
| Overcast/Flat | Add Contrast | Bring Black and White sliders inward to the histogram edges. |
| Harsh Midday | Save Detail | Be careful not to move sliders past the point of “clipping” (use Alt/Option). |
| Shady Portrait | Brighten Face | Slide the center (Midtone) slider to the left. |
| Sunset/Golden Hour | Enhance Warmth | Switch to the Red or Blue channel and adjust for warmth. |
Would you like me to explain how to use the eyedropper tools in Levels to fix white balance automatically?