Adobe Photoshop 2026: High-End Skin Retouching Tutorial,

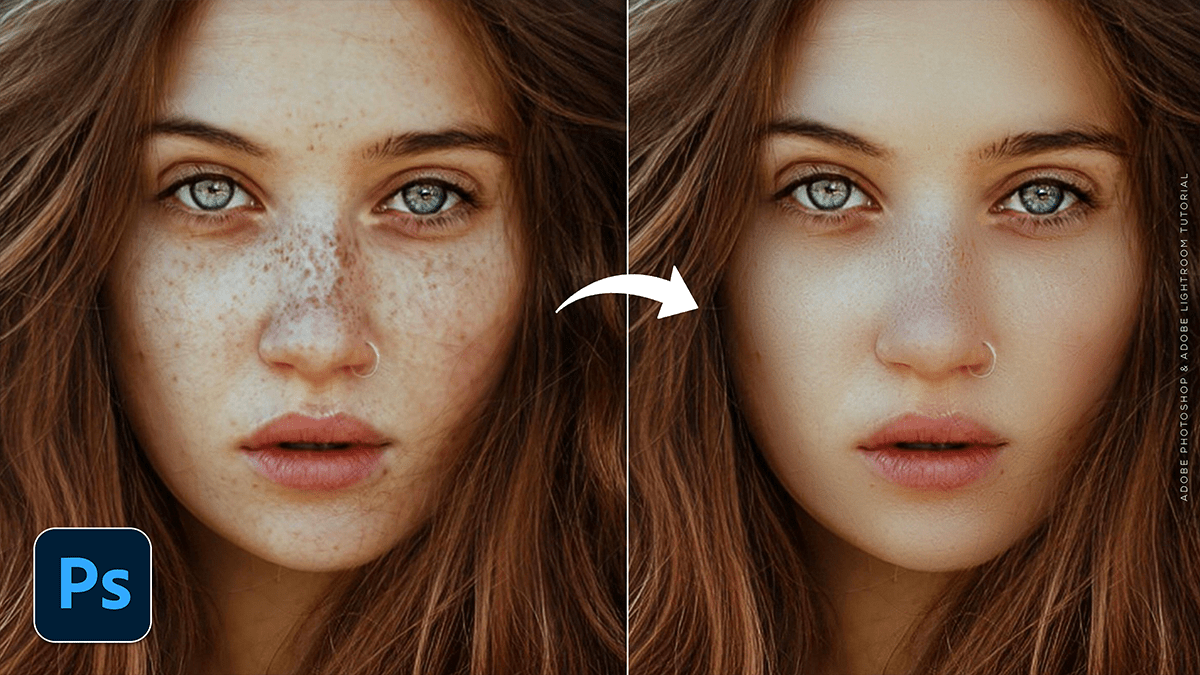
Therefore, in 2026, high-end skin retouching in Photoshop has evolved into a hybrid workflow that blends classic manual precision with powerful AI-driven tools. The goal remains “perfect but real”—retaining natural skin pores and texture while removing distractions and balancing tones.
Adobe Photoshop 2026: High-End Skin Retouching Tutorial
In other words, here is the professional workflow for high-end skin retouching in Photoshop 2026.
1. The Pre-Process: AI Cleaning
Therefore, before diving into manual work, use the improved AI tools to handle the “heavy lifting” of blemish removal.
Remove Tool (Generative AI): Therefore, set the Remove Tool to “Auto” and enable “Remove after each stroke.” It is now significantly better at distinguishing between a temporary blemish and a permanent beauty mark or freckle.
Generative Fill: For larger distractions (like flyaway hairs crossing the face), a quick selection followed by a Generative Fill prompt like “smooth skin texture” can save 20 minutes of manual cloning.
2. The Gold Standard: Frequency Separation
Therefore, High-end editors still rely on Frequency Separation because it allows you to edit color and texture on separate layers.
| Layer | Purpose | Common Tools |
| High Frequency | Fine details: Pores, fine lines, hairs. | Clone Stamp (Mode: Normal, Sample: Current Layer). |
| Low Frequency | Tones & Colors: Blotchy skin, transitions, shadows. | Lasso Tool + Gaussian Blur OR Mixer Brush. |
The 2026 Setup:
Therefore, duplicate your base layer twice. Name the top “Texture” and the bottom “Tone”.
In other words, on the Tone layer: Apply Gaussian Blur. Set the radius until the skin texture just disappears.
Therefore, on the Texture layer: Go to Image > Apply Image.
Layer: Tone
Blending: Subtract
Scale: 2 | Offset: 128
In other words, change the Texture layer blend mode to Linear Light.
Adobe Photoshop 2026: High-End Skin Retouching Tutorial,
3. Advanced Tonal Control: Dodge & Burn
In other words, this is what separates “smooth” skin from “high-end” skin. Instead of blurring, you are manually lightening and darkening pixels to create a 3D look.
Micro Dodge & Burn: Use a very small brush (1–3 px) on a 50% Gray layer (set to Overlay) to even out the “micro-contrast” of individual pores or small shadows.
Global Dodge & Burn: Use Curves adjustment layers to enhance the face’s natural highlights (cheekbones, bridge of the nose) and deepen shadows for a “magazine” finish.
4. 2026 Neural Filters & Plugins
In other words, Adobe’s Neural Filters have been updated for better realism in 2026:
Skin Smoothing Filter: Use this at low opacity (around 20–30%) as a finishing touch to unify the work you did in Frequency Separation.
Generative Upscale: If your source image is low-resolution, use Generative Upscale to “invent” realistic skin pores rather than just blurring the pixels.
Adobe Photoshop 2026: High-End Skin Retouching Tutorial,
Industry-Leading Plugins:
Retouch4me: The current leader in AI-driven retouching that automatically creates Dodge & Burn masks.
Imagenomic Portraiture 4: Remains a favorite for fast, high-volume workflows that still require a natural look.
Beauty Retouch UXP: A panel that automates the setup of professional layers (D&B, FS, etc.) to keep your workspace organized.
Pro Tip: Always zoom out to 25% frequently. It’s easy to get lost in the “micro” details and lose the natural shape of the face. If it looks like plastic, reduce the opacity of your retouching folder to 80%.
Would you like me to walk you through the specific settings for the “Apply Image” step for 16-bit vs. 8-bit images?