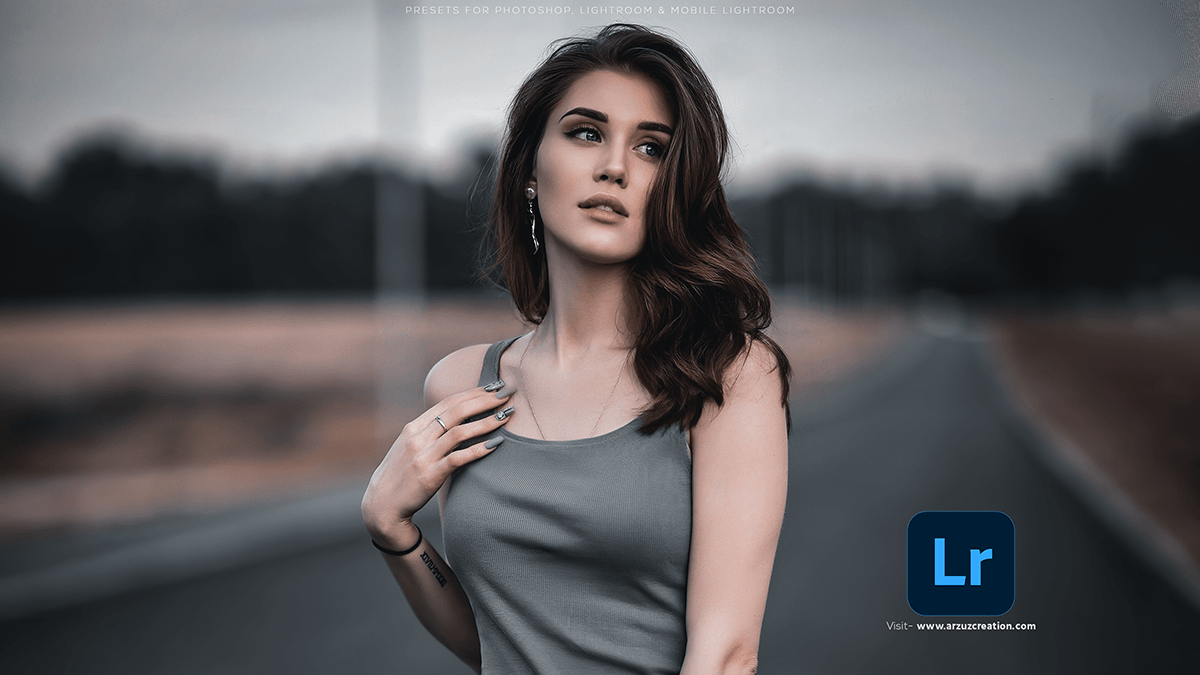
Black Color Grade Photoshop Tutorial 2024,
Therefore, In this Photoshop tutorial, you learn, How to create a black-tone color grading portrait look in Adobe Photoshop. In other words, This black color tone is a premium photo editing look. However, Photoshop presets are free to download.
Black Color Grade Photoshop Tutorial 2024,

Color grading in Photoshop can add a dramatic and cinematic quality to your photos, especially with a black tone effect. Here’s a step-by-step guide to achieving this look:
Open Your Image in Photoshop:
- For instance, Open Photoshop and load the image you want to edit.
Black Tone Color Grade, Convert the Image to Black and White:
- Adjustment Layer: Above all, Click on the
Adjustment Layericon at the bottom of the Layers panel (it looks like a half-filled circle). - Black & White: In addition, Select
Black & Whitefrom the list. This will convert your image to black and white. - Adjust Sliders: In the Properties panel, adjust the color sliders to get your image’s desired contrast and details.
Add Contrast with Curves:
- Curves Adjustment Layer: However, Again, click on the
Adjustment Layericon and selectCurves. - S-Curve: In the Curves panel, create an S-curve by dragging the line up in the highlights and down in the shadows. This will increase contrast.
Add a Matte Effect:
- Levels Adjustment Layer: Above all, Add a Levels adjustment layer.
- Output Levels: After that, In the Properties panel, adjust the
Output Levels. Bring the left slider (shadows) up slightly. This will give a faded black look to the darkest parts of your image.
Black Color Grade Photoshop Tutorial 2024,

Add a Tint (Optional):
- Solid Color Layer: Go to the
Adjustment Layericon and chooseSolid Color. - Choose Color: Pick a dark blue or cyan color and set the blending mode of this layer to
Soft LightorOverlay. - Adjust Opacity: Lower the opacity to around 10-20% to add a subtle tint to your image.
Final Adjustments:
- Brightness/Contrast: Add an
Brightness/Contrastadjustment layer if needed to fine-tune the overall exposure. - Vignette (Optional): Add a vignette by creating a new layer, filling it with black, and using a large soft brush to erase the layer’s center. Set this layer’s blending mode to
Soft Lightadjust the opacity to your liking.
Save Your Image:
- Save: Once you’re satisfied with your adjustments, save your image by going to
File > Save Asand choose your desired format.
Example Workflow:
For instance, Here’s a summary of the workflow in a visual format:
- Original Image: Load your image.
- Black & White Adjustment: Convert the image to black and white.
- Curves Adjustment: Increase contrast with an S-curve.
- Levels Adjustment: Add a matte effect.
- Solid Color Layer (Tint): Add a subtle color tint (optional).
- Brightness/Contrast: Fine-tune the exposure.
- Vignette: Add a vignette for a dramatic effect (optional).
- Save: Save your edited image.
By following these steps, you can create a striking black tone color grade that enhances the mood and drama of your photos.