Photoshop Outdoor Photo Editing Guide For Beginners,
Introduction,
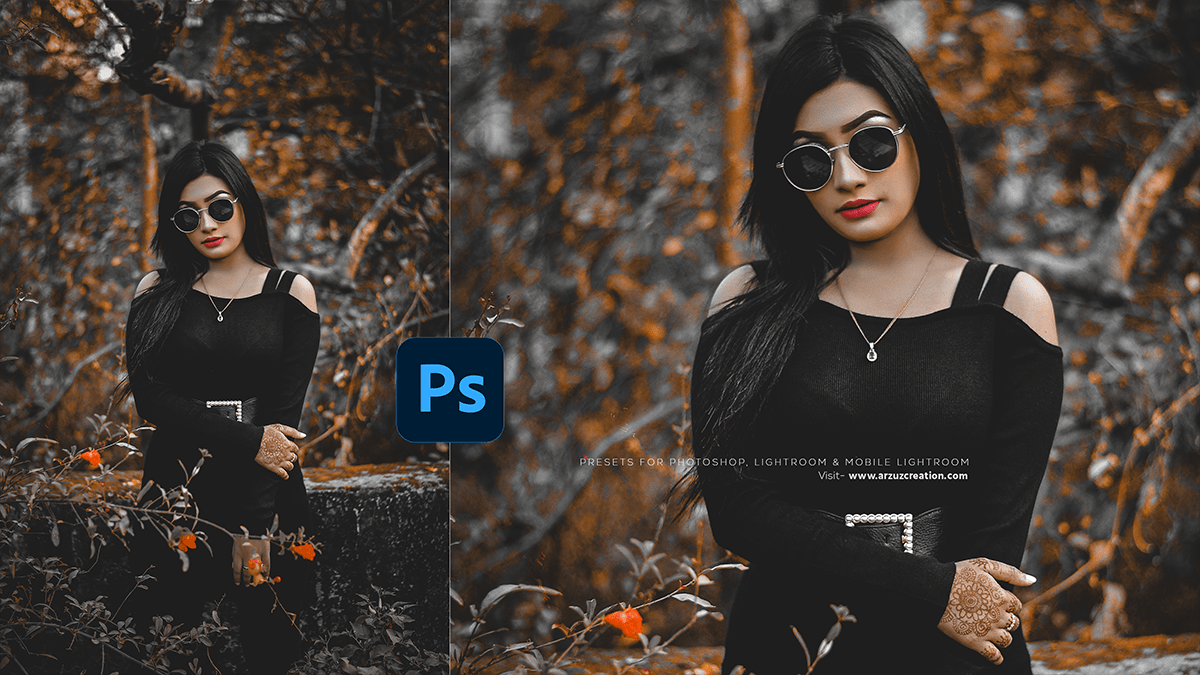
Outdoor photography captures the natural beauty of landscapes, wildlife, and the dynamic interplay of light and shadow. However, even the best outdoor photos can benefit from editing to enhance colors, correct lighting, and highlight key elements. Therefore, This guide will walk you through essential Photoshop techniques for editing outdoor photos.

Photoshop Outdoor Photo Editing Guide For Beginners,
Table of Contents,
- Basic Adjustments:
- Brightness and Contrast
- Exposure
- White Balance
- Color Correction:
- Hue/Saturation
- Vibrance
- Selective Color Adjustments
- Detail Enhancement:
- Sharpening
- Clarity
- Noise Reduction
- Advanced Techniques:
- Dodging and Burning
- Gradient Maps
- Sky Replacement
- Final Touches:
- Cropping and Straightening
- Adding Vignettes
- Exporting for Different Platforms
Photoshop Outdoor Photo Editing Guide For Beginners, Basic Adjustments,

Brightness and Contrast:
- Purpose: Adjust overall lightness and darkness to make the photo visually appealing.
- Steps:
- In other words, Open your photo in Photoshop.
- However, Go to
Image > Adjustments > Brightness/Contrast. - Adjust the sliders until you achieve the desired look.
Exposure:
- Purpose: Correct the overall exposure of the photo.
- Steps:
- For instance, Go to
Image > Adjustments > Exposure. - Above all, Adjust the
Exposure,Offset, andGamma Correctionsliders.
White Balance:
- Purpose: In addition, Correct color casts to ensure that whites appear white.
- Steps:
- After that, Go to
Image > Adjustments > Levels. - Use the white balance eyedropper tool to select a neutral white area in the image.
Photoshop Outdoor Photo Editing Guide For Beginners, Color Correction,
Hue/Saturation:
- Purpose: Similarly, Adjust the intensity and range of colors.
- Steps:
- Therefore, Go to
Image > Adjustments > Hue/Saturation. - In other words, Adjust the
Hue,Saturation, andLightnesssliders.
Vibrance:
- Purpose: However, Enhance the intensity of muted colors without over-saturating the entire image.
- Steps:
- For instance, Go to
Image > Adjustments > Vibrance. - Above all, Adjust the
VibranceandSaturationsliders.
Selective Color Adjustments:
- Purpose: Fine-tune specific colors in the image.
- Steps:
- Go to
Image > Adjustments > Selective Color. - Choose the color to adjust from the drop-down menu and modify the sliders.
Photoshop Outdoor Photo Editing Guide For Beginners, Detail Enhancement,
Sharpening:
- Purpose: In addition, Enhance details and textures.
- Steps:
- Similarly, Go to
Filter > Sharpen > Unsharp Mask. - Therefore, Adjust the
Amount,Radius, andThresholdsliders.
Clarity:
- Purpose: In other words, Increase mid-tone contrast to add depth.
- Steps:
- However, Create a new layer and go to
Filter > Camera Raw Filter. - For instance, Adjust the
Clarityslider.
Noise Reduction:
- Purpose: Above all, Reduce graininess, especially in low-light photos.
- Steps:
- In addition, Go to
Filter > Noise > Reduce Noise. - After that, Adjust the
Strength,Preserve Details,Reduce Color Noise, andSharpen Detailssliders.
Advanced Techniques,
Dodging and Burning:
- Purpose: Similarly, Lighten or darken specific areas to add depth and dimension.
- Steps:
- Therefore, Create a new layer and fill it with 50% gray.
- In other words, Change the layer blending mode to
Overlay. - However, Use the
Dodge ToolandBurn Toolto paint over the areas you want to adjust.
Gradient Maps:
- Purpose: For instance, Apply a gradient color effect for artistic purposes.
- Steps:
- Above all, Go to
Layer > New Adjustment Layer > Gradient Map. - In addition, Choose a gradient that complements your photo.
Sky Replacement:
- Purpose: Replace a dull or overexposed sky with a more dramatic one.
- Steps:
- Go to
Edit > Sky Replacement. - Choose a sky from the library or import your own.
Final Touches,
Cropping and Straightening:
- Purpose: Improve composition and remove unwanted elements.
- Steps:
- Use the
Crop Toolto adjust the framing. - Use the
Straighten ToolwithinCrop Toolto level the horizon.
Adding Vignettes:
- Purpose: Draw attention to the center of the image.
- Steps:
- Go to
Filter > Lens Correction. - Adjust the
Vignettesettings.
Exporting for Different Platforms:
- Purpose: Optimize the image for web, print, or social media.
- Steps:
- Go to
File > Export > Save for Web. - Choose the appropriate settings for your intended use.
Conclusion,
Editing outdoor photos in Photoshop can significantly enhance their impact. By following these steps, you can improve lighting, color, and details, transforming your photos into stunning visual masterpieces. Practice these techniques to develop your unique editing style and bring out the best in your outdoor photography.
