Lightroom Classic: How to Import Preset in Adobe Lightroom,

Therefore, To import presets in Adobe Lightroom, follow these steps:
For Lightroom Classic:
- Open Lightroom Classic:
Open Lightroom Classic on your computer. - Go to the Develop Module:
At the top-right, click on the Develop module. - Open the Presets Panel:
On the left-hand side, you’ll see the Presets panel. Click the small “+” button at the top-right of the panel. - Select ‘Import Presets’:
After clicking the “+”, select Import Presets from the drop-down menu. - Locate the Preset Files:
A file browser window will open. Navigate to the location where your preset files (.xmp or .lrtemplate) are stored. - Select and Import:
Choose the presets you want to import, then click Import. - Done:
Your presets will appear in the Presets panel and are now ready for use.
For Lightroom CC (Cloud-Based Version):
- Open Lightroom CC:
Launch the cloud-based version of Lightroom. - Open the Presets Panel:
Click on the Edit icon (three sliders) in the top right, then scroll down to the Presets section. - Import Presets:
Click on the three dots icon (“…”) next to the Presets heading, then choose Import Presets. - Select the Preset Files:
Navigate to the preset files (.xmp or .lrtemplate), select them, and click Import. - Done:
Your presets will be imported and displayed in the Presets section.
Once imported, the presets can be applied to any of your photos with a single click.
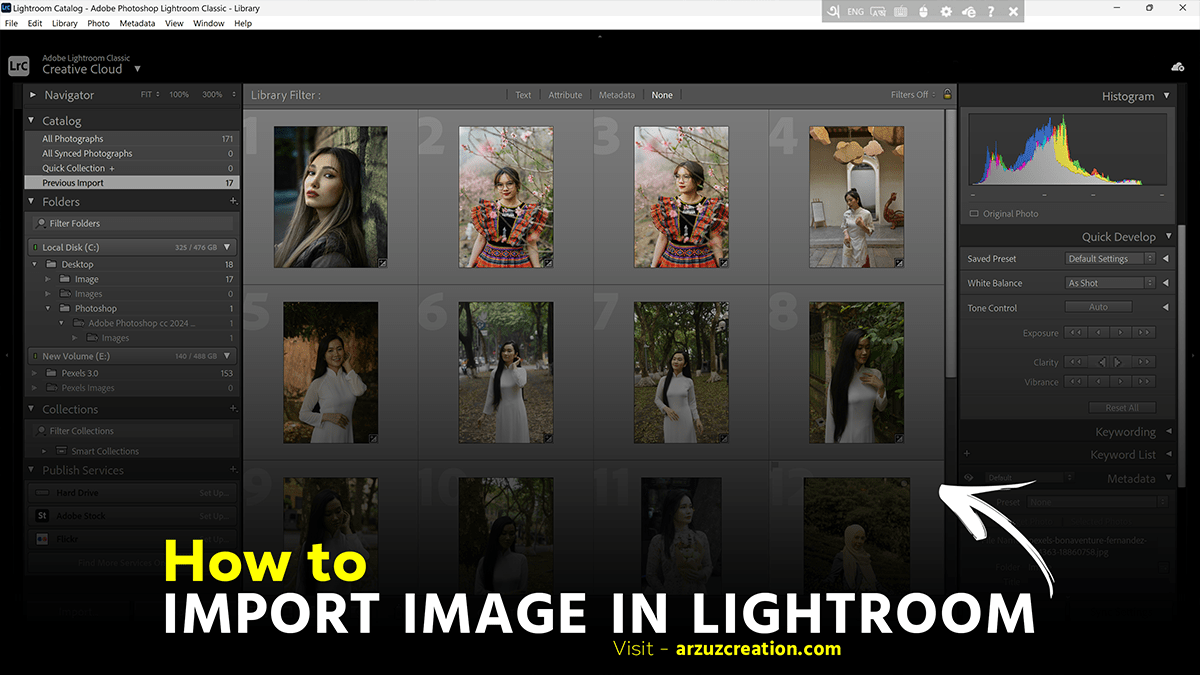
Lightroom Classic: How to Import Images in Adobe Lightroom,

In other words, To import images into Adobe Lightroom, follow these steps based on the version you’re using:
- Open Lightroom Classic:
However, Open the software on your computer. - Click ‘Import’:
For instance, In the bottom-left corner of the Library module, click on the Import button. - Select Source:
A new window will pop up. On the left panel, choose the location of the photos you want to import (e.g., your hard drive, external drive, or memory card). - Choose Images:
All available images from the selected source will appear in the center panel. Check or uncheck the photos you want to import. - Set Import Preferences:
However, At the top of the Import window, you’ll see four options:
- Copy as DNG: Above all, Copies and converts to DNG format.
- Copy: In addition, Copy the files to a location on your hard drive.
- Move: After that, Move the files to a different location.
- Add: Similarly, Add the photos to your catalog without moving them.
- Select Destination:
Therefore, On the right panel, choose the destination where you want to save the photos (if copying or moving). - Import Photos:
In other words, Once everything is set, click the Import button at the bottom right. Lightroom will then import your images into the catalog.
For Lightroom CC (Cloud-Based Version):
- Open Lightroom CC:
Therefore, Launch Lightroom CC on your computer. - Click ‘Add Photos’:
However, In the upper-left corner of the interface, click on the Add Photos button or drag and drop images directly into the workspace. - Select Photos:
A file browser will open. Navigate to the location of your images, select the ones you want to import, and click Review for Import. - Finalize Import:
In other words, Lightroom CC will display your selected images. If everything looks good, click Add Photos at the bottom right, and the images will be imported into your library.
Once imported, you can start organizing, editing, and working with your photos in Lightroom.
