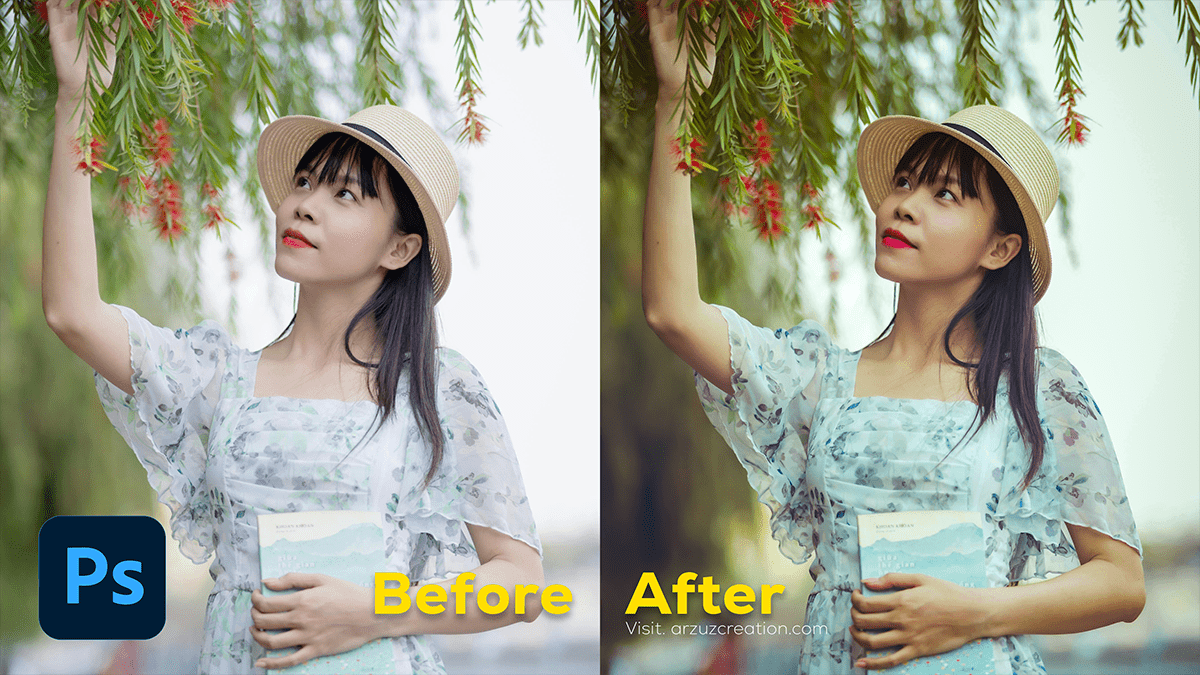
Adobe Photoshop 2024: Color Grade Tutorial For Beginners,

Therefore, Color-grading outdoor portraits in Photoshop can enhance the mood, emphasize the natural surroundings, and bring out the subject. In other words, Here’s a step-by-step guide to achieving beautiful color grading:
Step 1: Adobe Photoshop 2024: Color Grade Tutorial, Basic Adjustments
- Open your image in Photoshop.
- In other words, Go to the Adjustments panel or click on
Image > Adjustmentsand make basic adjustments using:
- Exposure: Adjust the brightness of the image.
- Contrast: Enhance the difference between light and dark areas.
- Shadows/Highlights: Fine-tune the lighting details.
Method 2: Adobe Photoshop 2024: Color Grade Tutorial, Use Camera Raw Filter
- However, Convert your layer to a Smart Object:
Right-click on the layer > Convert to Smart Object(so you can adjust settings later). - For instance, Go to
Filter > Camera Raw Filter. Here, you’ll find tools to improve the overall look:
- Temperature: Warm up the image for a golden hour look or cool it down for a moodier effect.
- Tint: Add a slight green or magenta tone to balance colors.
- Vibrance & Saturation: Increase vibrance to enhance the colors while preserving skin tones.
- Dehaze: This is great for outdoor portraits to cut through atmospheric haze.
Step 3: Use Curves for Tone Control
- However, Create a Curve adjustment layer (
Layer > New Adjustment Layer > Curves).
- Adjust the RGB curve to brighten or darken your image overall.
- However, Switch to individual Red, Green, and Blue channels to add color tones in shadows, mid-tones, or highlights (e.g., adding blue in the shadows and warming up highlights for a cinematic look).
Method 4: Adobe Photoshop 2024: Color Grade Tutorial, Color Balance
- For instance, Add a Color Balance adjustment layer (
Layer > New Adjustment Layer > Color Balance).
- For instance, Play with the sliders in the Shadows, Midtones, and Highlights. For outdoor portraits:
- Adding blue or cyan to the shadows can give a cool look.
- Adding yellow or red to the highlights can create a warm, sunset-like effect.
Adobe Photoshop 2024: Color Grade Tutorial For Beginners,

Step 5: Selective Color
- Above all, Use the Selective Color adjustment layer to fine-tune specific colors in the image.
- In addition, Adjust Reds and yellows for skin tones.
- In addition, Modify Greens, Blues, and Cyans for background foliage or sky tones.
Method 6: Hue/Saturation
- Above all, Apply a Hue/Saturation adjustment layer to target and adjust specific color ranges.
- Above all, You can enhance the saturation of greens and blues for a vivid outdoor environment.
- In addition, Lower the saturation of the yellows or reds to maintain natural-looking skin tones.
Step 7: Gradient Map for Mood
- In addition, Create a Gradient Map adjustment layer (
Layer > New Adjustment Layer > Gradient Map).
- After that, Choose a color gradient that matches the mood of your photo (e.g., warm browns and yellows for a sunset effect).
- After that, Change the Blend Mode of the gradient map to
Soft LightorOverlayand reduce the Opacity to around 20-40% for a subtle effect.

Method 8: Final Touches
- After that, Add a Vignette by going to, then under the Custom tab, use the Vignette sliders to darken the corners and focus attention on the subject.
- Dodge and Burn (use the Dodge/Burn tools) to emphasize highlights and shadows on the subject’s face and body for added depth.
By following these steps, you can create a beautifully color-graded outdoor portrait in Photoshop.
