Wedding Photo Editing Workflow: Adobe Photoshop 2026,

Therefore, editing a wedding gallery in Adobe Photoshop (2026) is a high-stakes, high-volume process that relies heavily on a mix of AI automation and manual precision. For a professional workflow, Photoshop is typically the “finishing school” for your best (hero) shots, while a tool like Lightroom handles the bulk of color grading.
In other words, here is the complete, professional workflow for wedding photo editing.
Wedding Photo Editing Workflow: Adobe Photoshop 2026,
Phase 1: Preparation & Culling:
Therefore, before opening Photoshop, you must filter your thousands of shots down to the best “keepers.”
The AI Assist: In other words, use tools like FilterPixel or Aftershoot to automatically group duplicates, flag closed eyes, and remove blurry shots.
Importing: Organize by event segment (e.g., 01_Getting_Ready, 02_Ceremony).
Base Edit: In other words, apply a consistent “Wedding Preset” in Lightroom or Adobe Camera Raw (ACR) to fix white balance and exposure across the entire gallery.
Phase 2: The Photoshop “Hero Shot” Workflow:
However, once you’ve selected your 50–100 most important photos (portraits, key moments), move them into Photoshop for high-end retouching.
Wedding Photo Editing Workflow: Adobe Photoshop 2026,
1. Advanced Clean-up (Generative AI)
The Remove Tool: However, use the Enhanced Remove Tool (updated in 2026) to instantly paint over distracting exit signs, photobombers, or stray power lines. It uses AI to fill the space realistically.
Generative Fill: If a guest’s arm is cut off or you need to extend a beautiful landscape, use Generative Expand to “uncrop” the photo and add more environment.
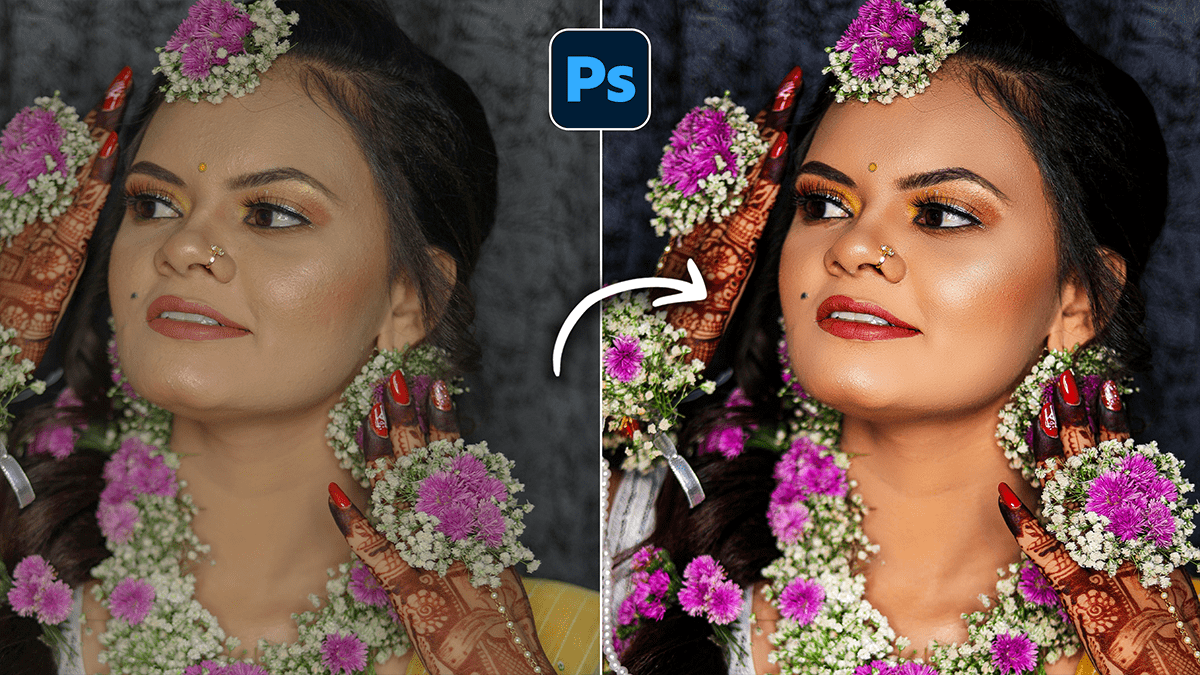
2. Professional Portrait Retouching:
Non-Destructive Skin: Use the Portrait AI or Neural Filters > Skin Smoothing. Keep the “Blur” slider low (around 15–20%) to retain natural skin texture while removing blemishes.
Dodge & Burn: However, create two Curves layers—one to brighten (Dodge) and one to darken (Burn). Use a soft brush with 1% flow to manually contour faces and make the subjects “pop” from the background.
Eye & Teeth Enhancement: For instance, use the Object Selection Tool to grab just the eyes/teeth. Use a subtle Levels adjustment to brighten the whites and add a “catchlight” sparkle.
Wedding Photo Editing Workflow: Adobe Photoshop 2026
3. Lighting & Depth:
Lens Blur (AI): For instance, if a portrait was shot at a high aperture (like f/5.6) but you want a “dreamy” look, use Filter > Blur > Lens Blur. The 2026 AI depth-mapping creates a realistic bokeh that distinguishes hair and veils from the background.
Sky Replacement: For outdoor shots with “blown-out” white skies, use Edit > Sky Replacement. Choose a soft, warm sunset or a clean blue sky to match the wedding’s mood.
Phase 3: Final Color Grading & Export:
Wedding Photo Editing Workflow: Adobe Photoshop 2026,
1. Cinematic Tones:
Color Balance & Selective Color: Use these adjustment layers to pull yellows out of the bride’s white dress or to add a “filmic” teal/blue hue to the shadows.
The 2026 “Clarity & Dehaze” Layer: Use the new non-destructive Clarity Adjustment Layer to add punch to details (like lace or rings) without affecting the entire image.
Camera Raw Filter 18.2.2, Action & Preset Free Download,
2. Batch Processing (Actions)
For instance, if you have 10 photos in the same lighting, record your edits as a Photoshop Action. You can then run this action on the remaining photos to save hours of manual work.
Wedding Photo Editing Workflow: Adobe Photoshop 2026,
3. High-Quality Export:
Settings: Export as JPEG at 300 DPI.
Color Space: Always use sRGB for web delivery to ensure colors look consistent on clients’ phones and laptops.
Pro Tip for 2026: Reference Images:
After that, in the Generative Fill panel, you can now upload a “Reference Image.” If you have a specific style of bouquet or a particular lighting vibe from a Pinterest board, the AI will use that reference to ensure its generated content matches your creative vision perfectly.
Would you like me to walk you through the specific steps for “Dodge and Burn” or how to set up a batch action?
