The Photoshop Lasso Tool: A Comprehensive Guide Tutorial,
Introduction,
Therefore, The Lasso Tool in Adobe Photoshop is a powerful selection tool used by graphic designers, photographers, and digital artists to make freeform selections of areas within an image. In other words, This guide provides an in-depth look at the Lasso Tool, its variants, and tips for effective use.
Table of Contents,
- However, the Overview of the Lasso Tool
- For instance, Types of Lasso Tools
- Standard Lasso Tool
- Polygonal Lasso Tool
- Magnetic Lasso Tool
- Above all, How to Use the Lasso Tool
- Basic Selection Techniques
- Adding and Subtracting from Selections
- In addition, Tips and Tricks for Effective Use
- After that, Common Applications
- Similarly, Conclusion
Overview of the Lasso Tool,
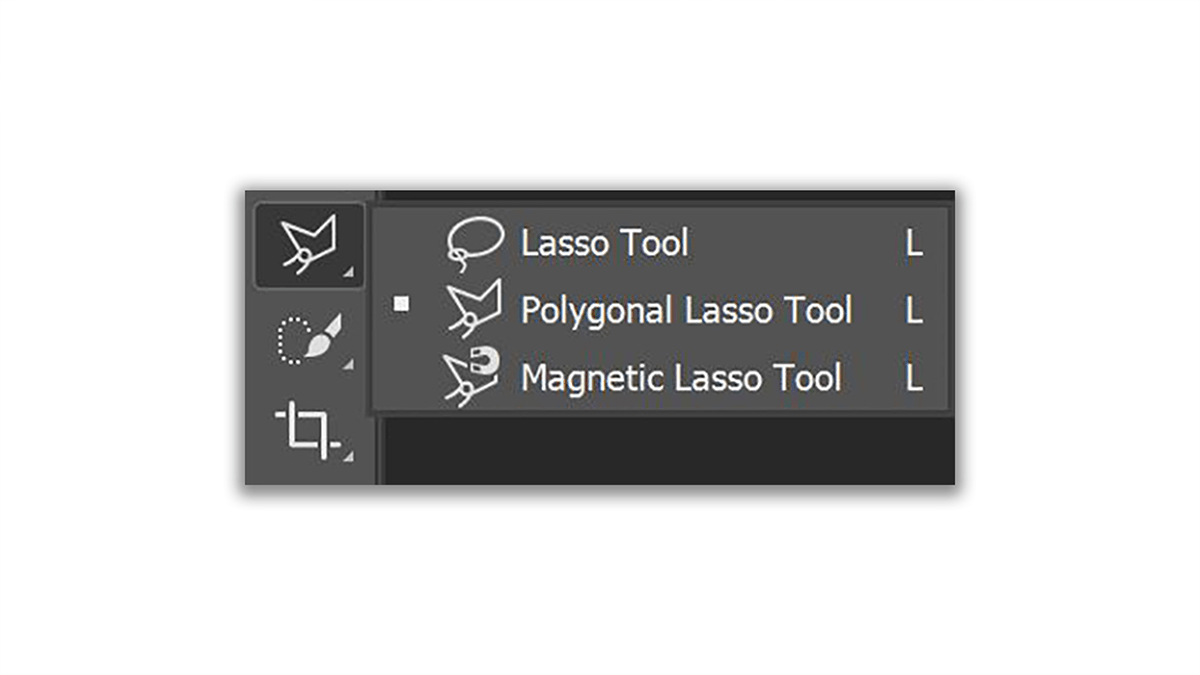
Therefore, The Lasso Tool allows users to draw freehand selections around objects or areas in an image. It’s particularly useful for isolating irregular shapes and areas that other selection tools might struggle with. In other words, The tool can be found in the Tools panel, represented by an icon resembling a rope.
However, Photoshop offers three variations of the Lasso Tool, each suited for different selection needs:
Standard Lasso Tool,
- Description: Allows for freehand drawing of selections.
- Use Case: Ideal for selecting areas with highly irregular or intricate shapes.
Polygonal Lasso Tool,
- Description: For instance, Enables selection by clicking points to create straight-line segments.
- Use Case: Best for selecting objects with straight edges.
Magnetic Lasso Tool,
- Description: Snaps to the edges of defined areas in an image based on color and contrast.
- Use Case: Useful for selecting objects with well-defined edges against contrasting backgrounds.
How to Use the Lasso Tool,
Basic Selection Techniques,
- Standard Lasso Tool: Click and hold to draw around the area you wish to select. Release to close the selection.
- Polygonal Lasso Tool: Click to place anchor points around the object. Double-click or click the starting point to close the selection.
- Magnetic Lasso Tool: Click to start the selection and move the cursor along the edge of the object. The tool will automatically snap to the edge.
Adding and Subtracting from Selections,
- Add to Selection: Hold the Shift key while making a new selection to add it to the existing one.
- Subtract from Selection: Hold the Alt (Option on Mac) key while making a new selection to subtract it from the existing one.
Tips and Tricks for Effective Use,
- Refine Edges: Use the “Select and Mask” feature to refine the edges of your selection, smoothing out jagged edges and fine-tuning the selection boundary.
- Feathering: Apply a feather to your selection to create a softer edge, which can help blend the selected area more naturally with the rest of the image.
- Zoom In: Zoom in on the image to make more precise selections, especially when working with the Standard or Polygonal Lasso Tools.
Common Applications,
- Object Isolation: Removing a subject from its background for compositing into a new image.
- Selective Editing: Applying adjustments or filters to specific parts of an image without affecting the entire image.
- Creating Masks: Generating layer masks to hide or reveal parts of a layer non-destructively.
Conclusion,
The Lasso Tool and its variants in Photoshop are indispensable for making detailed and precise selections. Mastering these tools can significantly enhance your photo editing and digital art projects, allowing for greater control and creativity.

