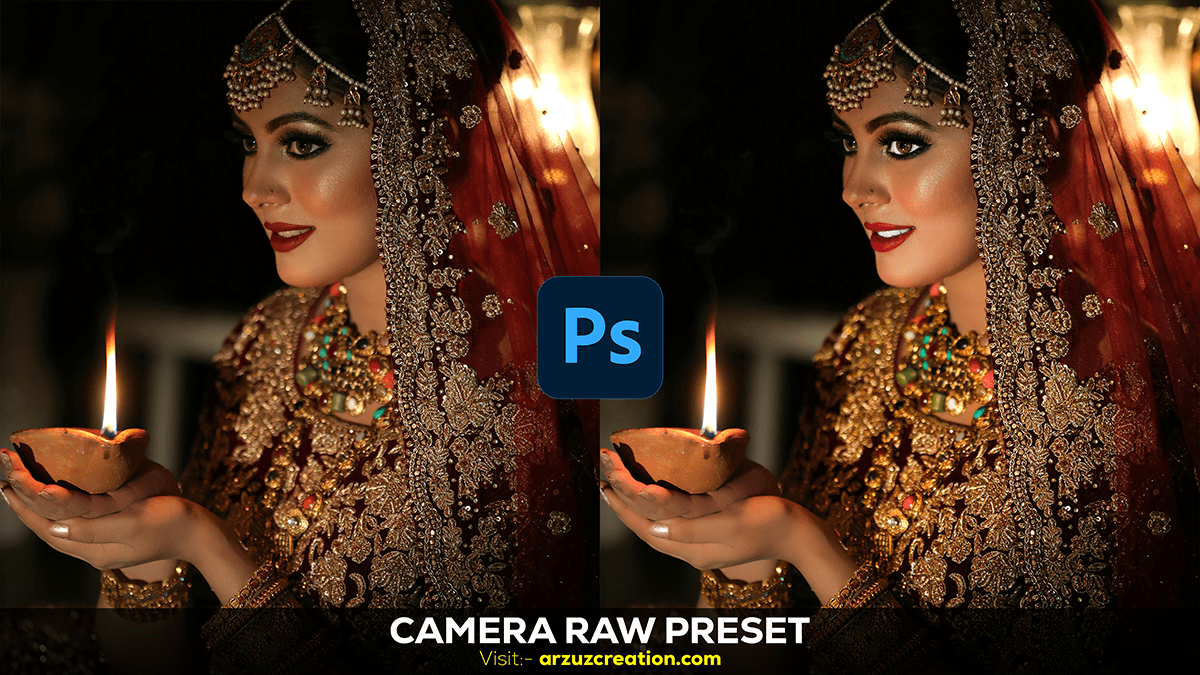
Photoshop Tricks For Editing Wedding Photography,

Therefore, Editing wedding photos in Photoshop CC can help enhance your images’ overall look and feel. In other words, Here’s a step-by-step guide to get you started:
Open Your Photo:
- However, Open Photoshop CC.
- For instance, Go to
File > Openand select the wedding photo you want to edit.
Photoshop Tricks For Editing Wedding Photography, Basic Adjustments:
Above all, Crop and Straighten:
- In addition, Select the Crop Tool (
C). - Therefore, Adjust the cropping frame to remove unwanted areas and straighten the horizon.
- Similarly, Press Enter to apply the crop.
Adjust Exposure and Contrast:
- After that, Go to
Image > Adjustments > Levels(Ctrl+L) orImage > Adjustments > Curves(Ctrl+M). - In other words, Adjust the sliders to improve the exposure and contrast. Move the mid-tone slider for brightness and the shadow/highlight sliders for comparison.
White Balance:
- However, Go to
Image > Adjustments > Color Balance(Ctrl+B) orImage > Adjustments > Photo Filter. - For instance, Adjust the color sliders to correct any color cast and achieve a natural white balance.
Photoshop Tricks For Editing, Photoshop CC,
Enhancing the Photo:
Retouching Skin:
- Above all, Duplicate the background layer (
Ctrl+J). - In addition, Use the Spot Healing Brush Tool (
J) to remove blemishes and imperfections. - After that, For more detailed work, use the Healing Brush Tool or Clone Stamp Tool (
S).
Smooth Skin:
- Similarly, Apply a Gaussian Blur (Filter > Blur > Gaussian Blur) to a duplicate layer.
- Add a layer mask and invert it (
Ctrl+I). - Use a soft white brush to paint over the skin areas, revealing the blur and smoothing the skin.
Sharpening:
- Merge all layers into a new layer (
Ctrl+Shift+Alt+E). - Go to
Filter > Sharpen > Unsharp Mask. - Adjust the Amount, Radius, and Threshold sliders to sharpen the image.
How to Edit Wedding Photos in Photoshop CC, Color Grading:
Hue/Saturation:
- Go to
Image > Adjustments > Hue/Saturation(Ctrl+U). - Adjust the Hue, Saturation, and Lightness sliders to achieve the desired color balance.
Selective Color:
- Go to
Image > Adjustments > Selective Color. - Adjust the colors individually to enhance specific tones in the image (e.g., improving the greenery, enhancing the sky).
How to Edit Wedding Photos in Photoshop CC,


Adding Effects:
Vignette:
- Please create a new layer and fill it with black.
- Go to
Filter > Lens Correction, and under the Custom tab, adjust the Vignette slider. - Change the layer blending mode to Soft Light and adjust the opacity to your liking.
Gradient Map:
- Go to
Layer > New Adjustment Layer > Gradient Map. - Choose a gradient that enhances the photo’s mood and adjust the layer opacity.
Photoshop Tricks For Editing Wedding Photography, Final Touches:
Dodge and Burn:
- Create a new layer and set it to Overlay.
- Use a soft white brush to dodge (lighten) and a soft black brush to burn (darken) areas of the photo.
Add a Signature:
- Use the Text Tool (
T) to add a signature or watermark.
Save Your Work:
- Save the edited photo in your desired format (
File > Save As).
Following these steps, you can enhance and perfect your wedding photos in Photoshop CC, making them look professional and polished.
