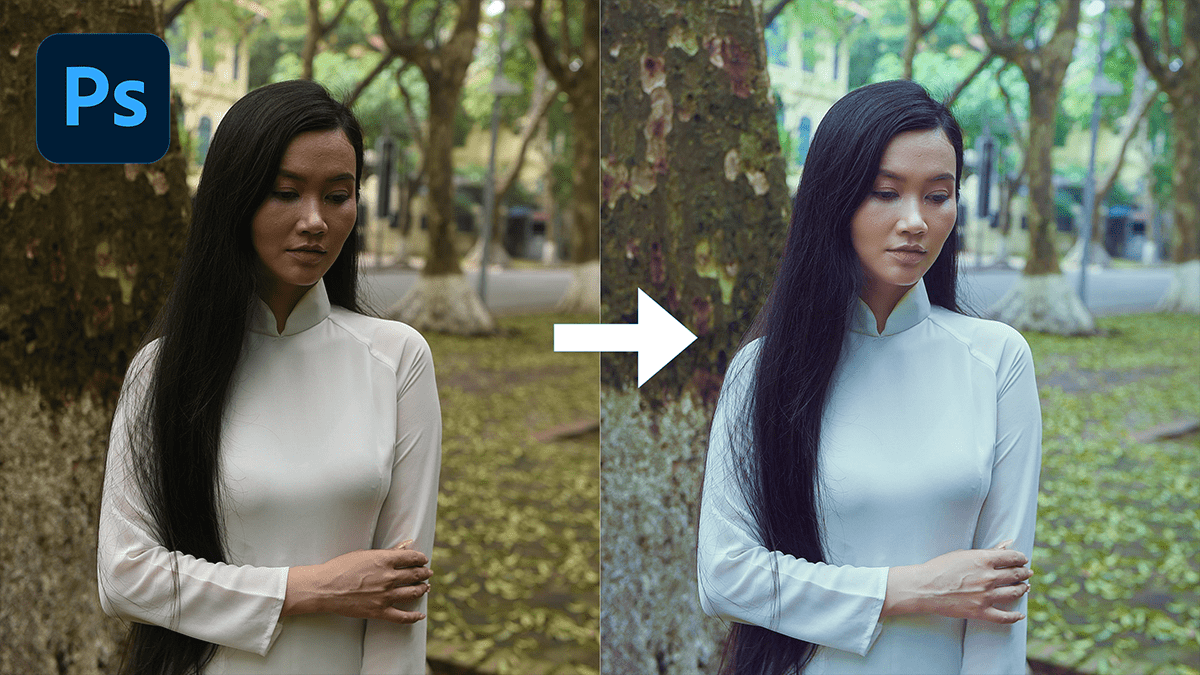
Adobe Photoshop Normal Photo Editing Tutorial,

Therefore, Editing a normal photo in Photoshop typically involves several basic steps to improve the overall appearance. In other words, Here’s a straightforward workflow for editing:
Open the Photo
- In other words, Go to File > Open and select the photo you want to edit.
Adjust Lighting and Exposure
- Brightness/Contrast: Go to Image > Adjustments > Brightness/Contrast to adjust the brightness and contrast.
- Levels: Use Image > Adjustments > Levels to adjust shadows, mid-tones, and highlights for better exposure.
- Curves: Go to Image > Adjustments > Curves for more advanced control over the photo’s tonality.
White Balance Correction
- However, Use Image > Adjustments > Color Balance or Photo Filter to adjust the white balance if the photo looks too warm or cold.
Adobe Photoshop Normal Photo Editing, Sharpen the Image
- However, Go to Filter > Sharpen > Unsharp Mask and adjust the settings to enhance details without overdoing it.
- For instance, Alternatively, use Smart Sharpen for finer control.
Remove Blemishes (Healing Brush/Spot Healing Tool)
- For instance, Select the Spot Healing Brush Tool from the toolbar to remove small blemishes or imperfections.
- Above all, For more control, use the Healing Brush Tool to sample from clean areas of the image.
Crop the Image:
- Above all, Use the Crop Tool from the toolbar to adjust composition by cropping unnecessary image parts.

Adobe Photoshop Normal Photo Editing, Color Enhancements:
- Saturation: Go to Image > Adjustments > Hue/Saturation to adjust the vibrance and saturation of the colors.
- Selective Color: If you want to enhance specific colors, use Image > Adjustments > Selective Color for more targeted adjustments.
Fix Distortions:
- In addition, Go to Filter > Lens Correction to fix any distortion, vignetting, or chromatic aberrations from the lens.
Adobe Photoshop Normal Photo Editing, Noise Reduction:
- In addition, If the image has noise (grain), use Filter > Noise > Reduce Noise to smooth out the noise.
Adobe Photoshop Normal Photo Editing, Final Touches:
- After that, Consider adding a subtle vignette by going to Filter > Lens Correction and adding some darkening to the edges.
- Similarly, Use Dodge and Burn tools to lighten or darken areas of the image for more depth and dimension.
Save the Edited Image:
- After that, Once satisfied with the changes, go to File > Save As and save the edited version in your desired format (JPEG, PNG, TIFF, etc.).
This workflow is simple yet effective for standard photo editing tasks. Do you want more details on any specific step?