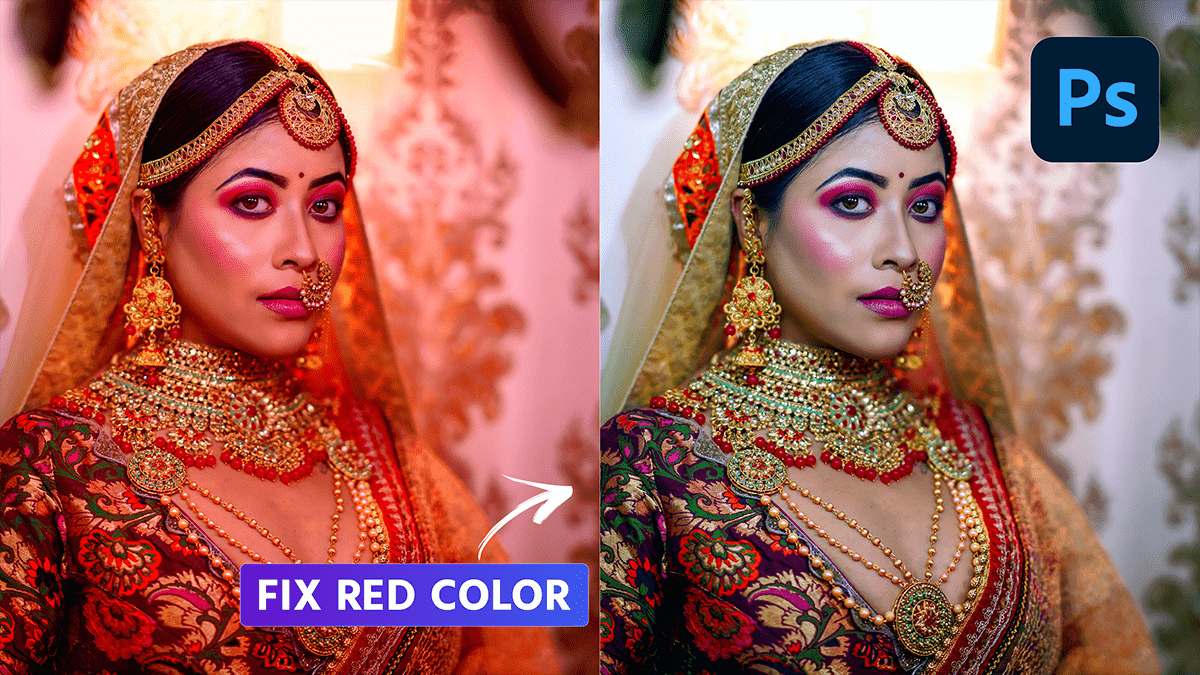
Red color cast remove in Photoshop 2024, a Professional photo editing tutorial for beginners.

Therefore, In this Photoshop tutorial, you learn, How to remove the red color cast from an image in Photoshop 2024. I will show you, step by step remove the red color cast. If you learn manually please watch this video from my YouTube channel.
In other words, To remove a red color in Photoshop, follow these steps:
1. Open the image in Photoshop.
2. However, Go to the “Image” menu and select “Adjustments” > “Color Balance”.
3. For instance, In the “Color Balance” dialog box, select the “Preserve Luminosity” checkbox.
4. Adjust the sliders under the “Midtones” section to remove the red color. You may need to increase the cyan and blue sliders to counteract the red.
5. Above all, Preview the changes by clicking the “OK” button, then adjust the sliders if necessary.
6. In addition, Click on the “OK” button again to apply the changes and close the dialog box.
7. If you still see some red tint, you can also try using the “Selective Color” adjustment layer instead of “Color Balance”. This allows you to target specific color ranges and make more precise adjustments.
Red Color Cast Remove in Photoshop 2024,
8. After that, To use “Selective Color”, go to the “Layer” menu and select “New Adjustment Layer” > “Selective Color”.
9. Similarly, In the “Selective Color” dialog box, select “Neutrals” from the drop-down menu at the top of the dialog box.
10. In other words, Adjust the cyan, magenta, yellow, and black sliders as needed to remove the red color. You may need to increase cyan and magenta to counteract the red.
Please watch this tutorial,
11. Preview the changes by clicking on the “OK” button, and then adjust further if necessary.
12. Click on the “OK” button again to apply the changes and close the dialog box.
13. You can also try using a white balance adjustment layer if your image was shot in RAW format or if you have access to a reference image with accurate colors for white balance purposes.
In conclusion, To do this, go to the “Layer” menu and select “New Adjustment Layer” > “White Balance”. Follow the prompts to select a reference image or set a custom white balance value based on your preferences.
