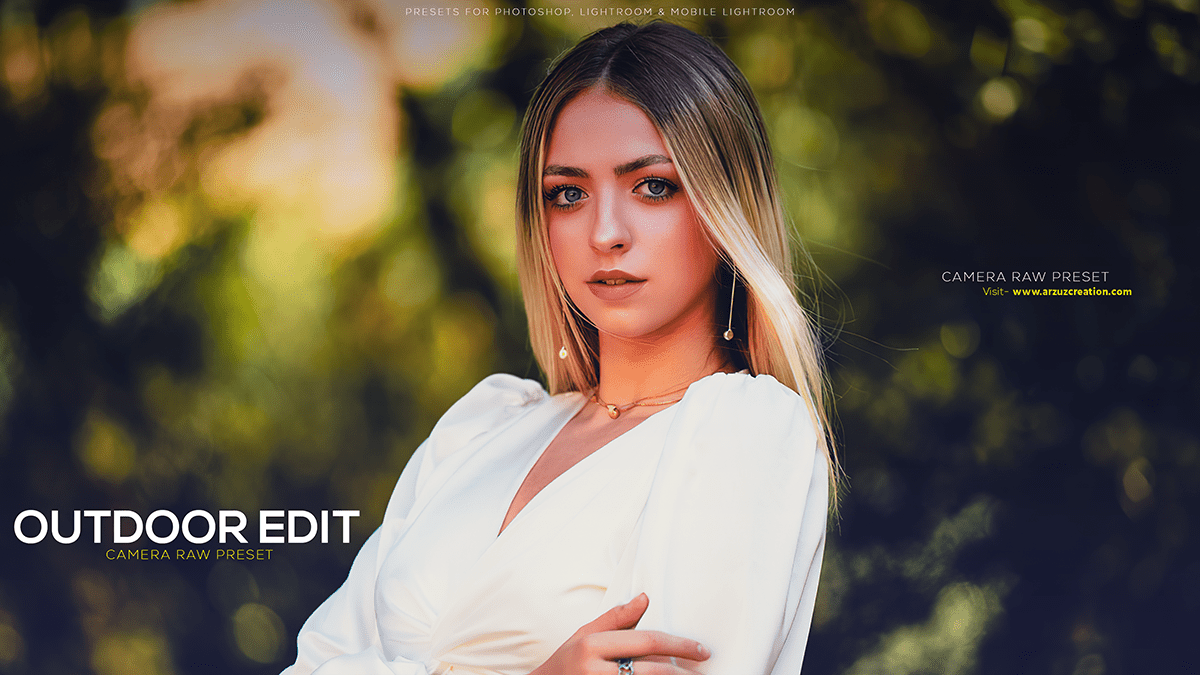
Outdoor photo editing tricks for beginners, How to edit outdoor portrait photo editing in Adobe Photoshop camera raw filter. Photoshop presets are free to download.

Therefore, In this Photoshop tutorial, you learn, How to edit outdoor portraits & Indoor portraits in the Adobe Camera raw filter Photoshop plugin. In other words, Step by Step you learn this photo editing work
Outdoor Photo Editing Tricks For Beginners,
Outdoor portrait editing in Photoshop can enhance the overall appearance of your images, making your subjects look their best. Follow these steps to edit an outdoor portrait:
However, Open the Image in Photoshop: Launch Adobe Photoshop and open the outdoor portrait you want to edit.
Duplicate the Background Layer: Click on the ‘Background‘ layer in the Layers panel and then go to Layer > Duplicate Layer. Rename the new layer to something like “Color Grading” or “Initial Edits.”
Click here to download this preset file,
Crop and Straighten the Image: If needed, use the Crop Tool (C) to adjust the image’s composition and remove any unwanted elements. To straighten the image, activate the Ruler Tool (shortcut: K), draw a line along an edge that should be horizontal or vertical, and then pull the line to correct the perspective.
Adjust Contrast and Brightness: Use Levels (Image > Adjustments > Levels) or Curves (Image > Adjustments > Curves) to enhance the contrast and brightness of the image. For instance, This will make the portrait look more vibrant and eye-catching.
Click here to watch this video tutorial,
Remove Skin Blemishes and Imperfections: Create a new layer above the “Color Grading” layer and use a Healing Brush or Spot Healing Brush tool to remove any blemishes, spots, or unwanted elements from the subject‘s skin.
Apply Color Grading: To give the portrait a more cinematic or natural look, use adjustment layers like Hue/Saturation, Color Balance, or Selective Color. Above all, Experiment with different settings to achieve the desired effect.
Learn, Professional Photo Editing,
Sharpen the Image: Create a new layer above all others and use the High Pass filter (Filter > Other > High Pass) to add sharpness to the portrait. Set the blending mode of this layer to “Overlay” or “Soft Light” to see the effect.
Add Vignette (Optional): To draw attention to the subject, create a new layer and use a large, soft-edged brush to paint a dark color (like black or dark gray) around the edges of the image. Lower the layer’s opacity to control the intensity of the vignette.
Outdoor Photo Editing Tricks For Beginners,
Save the Image: Once you’re satisfied with your edits, save the image as a new file to preserve the original. You can use File > Export > Export As to choose the desired file format and resolution.
Remember, editing should be done with care and respect for the original image. Always strive for a natural and pleasing result that enhances the subject’s features without overdoing it.
