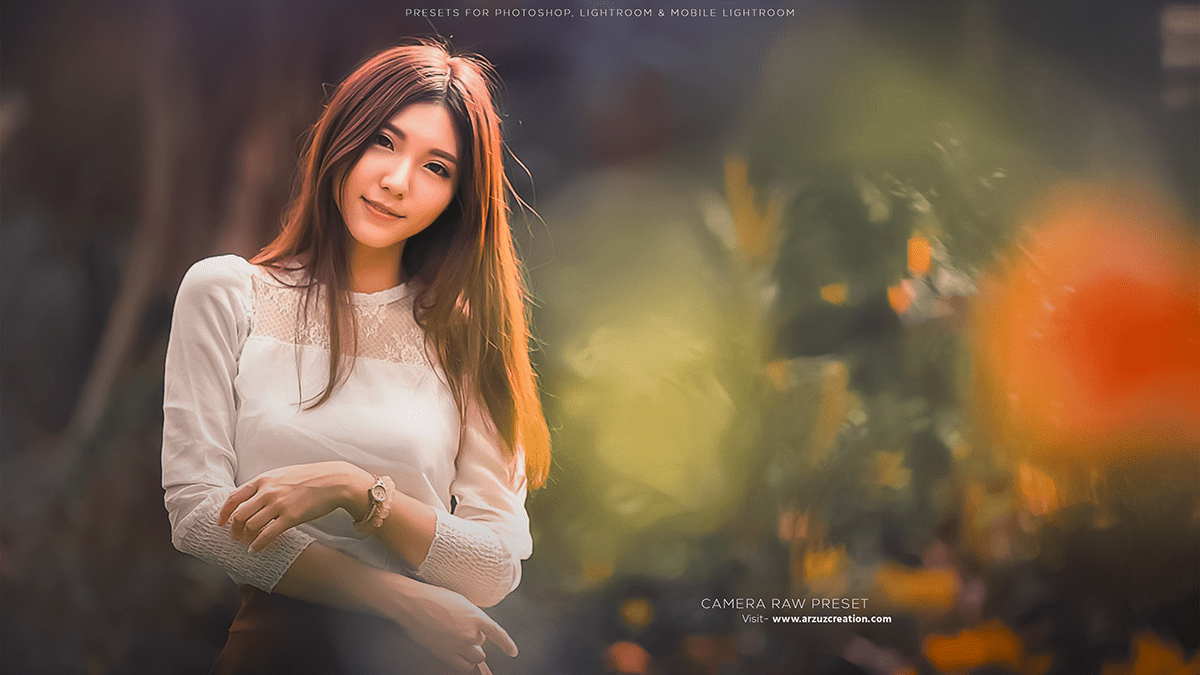
Color Grading Photoshop Presets, How to Outdoor Portrait Photo Color Grading in Adobe Photoshop. Photoshop Professional Photo Editing Tutorial For Beginners. Step by Step You Learn This Editing Work.

Therefore, In this Photoshop tutorial, you learn, How to Edit Outdoor Portrait Photos in Adobe Photoshop.
Easy Color Grading Tutorial in Photoshop:
Introduction: Color grading is an essential aspect of photo editing, as it helps to enhance the mood, atmosphere, and overall visual appeal of an image. In other words, In this tutorial, we will guide you through the process of color-grading a photograph using Adobe Photoshop. However, This tutorial is suitable for beginners and intermediate users.
Color Grading Photoshop Presets,
Open Your Image in Photoshop: Start by opening the image you want to color grade in Adobe Photoshop. You can either import the image from your computer or open it directly from a linked source like Lightroom or a camera.
Duplicate the Background Layer: To preserve the original image, right-click on the background layer and select “Duplicate Layer.” Name the new layer as “Color Grade” or something similar, so you can easily identify it later.
Click here to download this preset file,
Apply a Color Lookup Adjustment Layer: Photoshop offers a variety of built-in color lookup tables (LUTs) that can help you achieve different color grading effects. To apply a LUT, go to the “Adjustments” panel and click on “Color Lookup.” Browse through the available LUTs and choose one that suits your desired color grade. For instance, You can always experiment with multiple LUTs to see which one works best for your image.
Adjust the Color Balance: To further refine the color grade, go to “Image” > “Adjustments” > “Color Balance.” This tool allows you to adjust the overall hue and saturation of the shadows, mid-tones, and highlights. Experiment with these settings to achieve the desired color balance for your image.
Click here to watch this video tutorial,
Use the Curves Adjustment Layer for Contrast and Tone: The Curves adjustment layer is a powerful tool for controlling contrast and tonal range in your image. Click on the “Adjustments” panel and select “Curves.” Adjust the curve by clicking on different points and dragging them up or down to increase or decrease the brightness and contrast in specific tonal ranges. Be cautious not to overdo it, as excessive contrast adjustments can lead to a loss of detail in the image.
Learn, Professional Photo Editing,
Fine-tune with Selective Color Adjustment: To make more precise color adjustments, use the “Selective Color” adjustment layer. This tool allows you to target specific colors in your image and alter their hue, saturation, or brightness. For instance, you might want to increase the warmth of the image by boosting the yellow or orange tones.
Final Touches and Save: Once satisfied with your color grade, add a layer mask to the “Color Grade” layer and use a soft black brush to paint away unwanted color changes. Finally, save your work in the desired format, such as JPEG or PNG.
Learn, Adobe Lightroom Photo Editing,
Conclusion: This tutorial provides a basic introduction to color grading in Photoshop. With practice and experimentation, you can develop your skills and create stunning color-graded images. Remember that color grading is subjective, and the key is to achieve the desired visual effect for your specific project.
