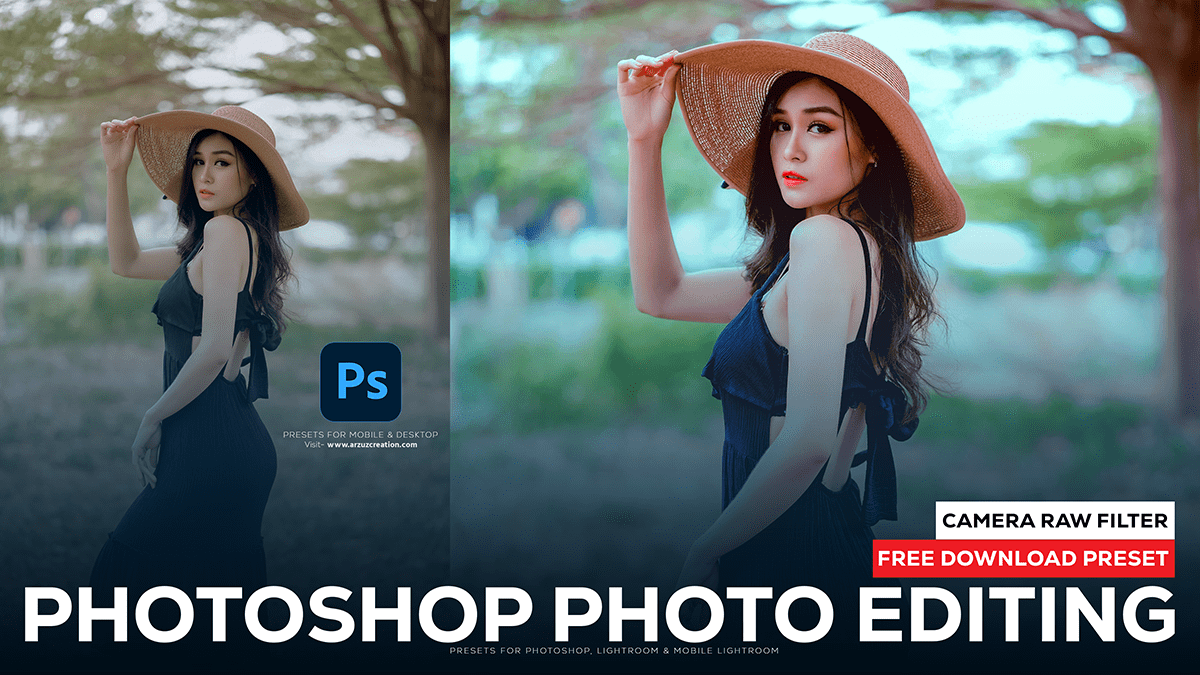
Outdoor Editing Adobe Photoshop Tutorial For Beginners. In other words, How to Edit Outdoor Portrait Photos in Adobe Photoshop. However, Professional Photo Editing in Adobe Photoshop. Photoshop Tutorial.
Therefore, In this Photoshop tutorial, you learn, How to edit portrait photos in Adobe Photoshop camera raw filter.

Outdoor Editing Adobe Photoshop Tutorial For Beginners,
Outdoor photo editing in Photoshop involves several steps to enhance the overall appearance and quality of your images. Here’s a general guideline to help you get started:
Open the image: For instance, Launch Adobe Photoshop and open the outdoor photo you want to edit.
Crop and straighten the image: If needed, use the Crop Tool (C) to remove any unwanted areas or to adjust the composition. You can also use the Ruler Tool (shortcut: ‘R’) to straighten the image horizontally or vertically if it’s not level.
Lightroom Photo Editing,
Adjust color balance: Above all, Go to “Image” > “Adjustments” > “Color Balance” or use the shortcut ‘B’ to open the Color Balance panel. Adjust the sliders to bring the colors in your image closer to what you see in real life.
Click here to download this preset file,
Adjust brightness and contrast: After that, Use the Levels adjustment layer (found under “Layer” > “New Adjustment Layer” > “Levels”) or the Curves tool (found under “Layer” > “New Adjustment Layer” > “Curves”) to adjust the brightness and contrast of your image. This will help to make your photo look more vibrant and eye-catching.
Enhance details and sharpen: Apply a High Pass filter or use the Unsharp Mask tool to bring out more details in your photo. Go to “Filter” > “Other” > “High Pass” or use the keyboard shortcut ‘Ctrl+Alt+C’ (Windows) or ‘Cmd+Option+C’ (Mac). Then, adjust the radius to enhance the details. Afterward, use the Sharpen tool (found under “Filter” > “Sharpen”) to make your image appear sharper.
Click here to watch this video tutorial,
Correct distortions and perspective: Use the Lens Correction filter (found under “Filter” > “Lens Correction”) to correct any distortions or perspective issues in your photo.
Adjust lighting: If your photo has harsh shadows or lacks sufficient lighting, use the Dodge and Burn tool (found under the “S” toolbar) to lighten or darken specific areas of your image.
Adjust saturation: If needed, adjust the saturation of your image to make the colors more vivid. Go to “Image” > “Adjustments” > “Hue/Saturation” or use the shortcut ‘Ctrl+U‘ (Windows) or ‘Cmd+U’ (Mac).
Adobe Photoshop Professional Photo Editing,
Retouch and remove imperfections: Use the Spot Healing Brush Tool (J) or the Healing Brush Tool (J) to remove any flaws, blemishes, or unwanted objects from your image.
Add final touches: If desired, add any additional adjustments, such as vignetting, noise reduction, or a texture overlay to enhance your photo’s overall look.
Remember, always work non-destructively by using adjustment layers and save your work regularly. Practice.
