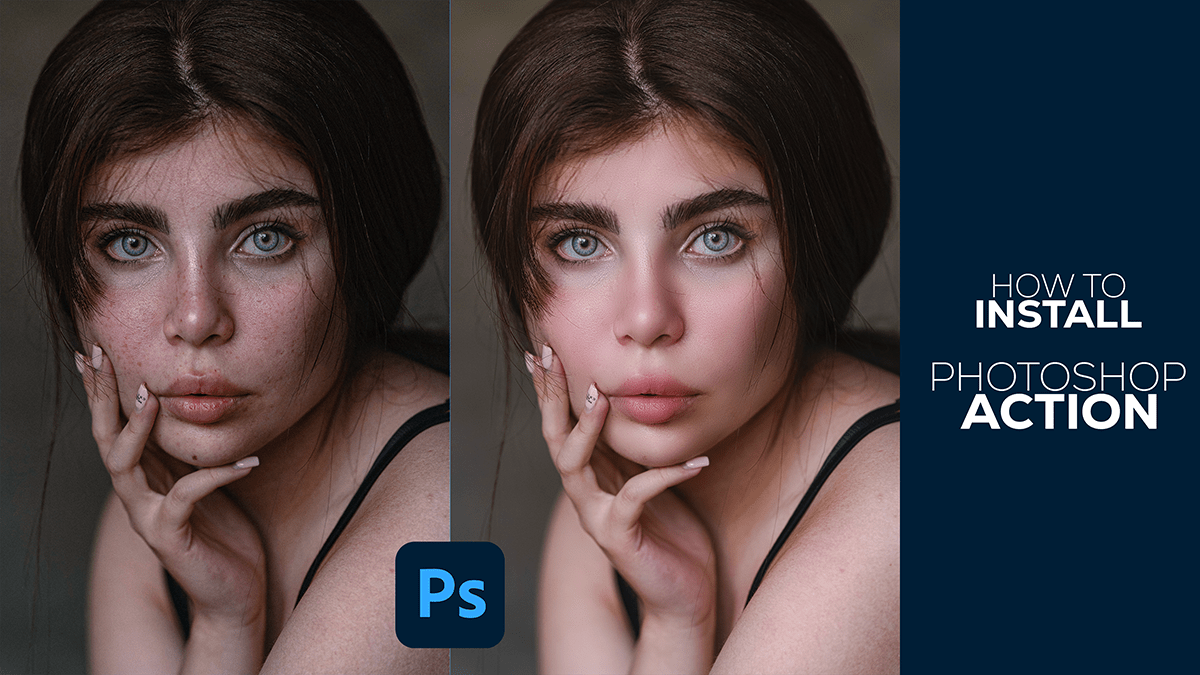
Adobe Photoshop skin retouch tutorial. In other words, How to skin retouching in Adobe Photoshop. Mastering the art of skin retouching tutorial for beginners. Photoshop actions are free to download.
Therefore, In this Photoshop tutorial, you learn, How to use skin retouch actions in Photoshop.

Understanding Skin Retouching in Adobe Photoshop,
In this day and age of digital photography and photo editing, I think creating flawless skin is a huge skill. We can create flawless skin using the Adobe Photoshop application. And this can give us a good result. There are some powerful tools that we can use to restore the skin of any image. In today’s tutorial, we will learn the steps you need to know for professional skin restoration.
I can provide you with a basic tutorial on skin retouching in Adobe Photoshop. Here’s a step-by-step guide:
Open Your Image: Start by opening the image you want to retouch in Adobe Photoshop.
Duplicate the Background Layer: Before you start retouching, it’s always a good idea to work on a duplicate layer. Right-click on the Background layer in the Layers panel and select “Duplicate Layer”.

Spot Healing Brush Tool: Select the Spot Healing Brush Tool (J) from the toolbar. This tool is great for quickly removing small blemishes, spots, and imperfections. Adjust the brush size as needed and simply click on the areas you want to retouch.
Healing Brush Tool: If you have larger areas to retouch, like wrinkles or scars, you can use the Healing Brush Tool (J). Alt-click (Option-click on Mac) on an area close to the imperfection to sample the texture and color, then paint over the imperfection to blend it in with the surrounding skin.

Clone Stamp Tool: The Clone Stamp Tool (S) is another option for retouching larger areas. It works similarly to the Healing Brush Tool but gives you more control over the sampling area. Alt-click (Option-click on Mac) to set the sampling point, then paint over the imperfection.
Frequency Separation (Optional): For more advanced retouching, you can use Frequency Separation to separate the texture of the skin from its tone. This allows you to retouch texture and color independently. There are many tutorials available online that cover Frequency Separation in detail.
Adjustment Layers: Use Adjustment Layers to adjust the overall tone and color of the skin. For example, you can add a Curves Adjustment Layer to fine-tune the brightness and contrast, or a Hue/Saturation Adjustment Layer to adjust the color tones.

Dodge and Burn: Create a new layer set to “Overlay” blending mode and use the Dodge Tool (O) to brighten areas of the skin you want to emphasize, and the Burn Tool (O) to darken areas you want to de-emphasize. This can help add dimension and depth to the skin.
Professional Photo Editing,
Final Touches: Zoom out and take a look at the overall image. Make any final adjustments as needed, and don’t forget to save your work!
Remember, the key to natural-looking skin retouching is subtlety. Avoid overdoing it, as it can lead to an unnatural and plastic-looking result. Practice and experimentation are key to mastering skin retouching in Photoshop.
