Adobe Photoshop Tool 2024 Tutorial For Beginners,

Therefore, Adobe Photoshop is a powerful image editing software developed by Adobe Inc. It’s widely used by photographers, graphic designers, and digital artists for creating, editing, and enhancing images. In other words, Here’s a more detailed guide to help you get started with Adobe Photoshop:
Getting Started,
- Download and Install: However, Get Photoshop from the Adobe Creative Cloud website and install it on your computer.
- Open Photoshop: For instance, Launch the application.
- Create a New Document: Above all, Go to
File > Newor pressCtrl+N(Cmd+N on Mac). Choose your document’s dimensions, resolution, and color mode.
Adobe Photoshop Tool 2024 Tutorial For Beginners,
Understanding the Interface,
- Menu Bar: In addition, Located at the top; includes essential menus like File, Edit, Image, Layer, Select, Filter, View, Window, and Help.
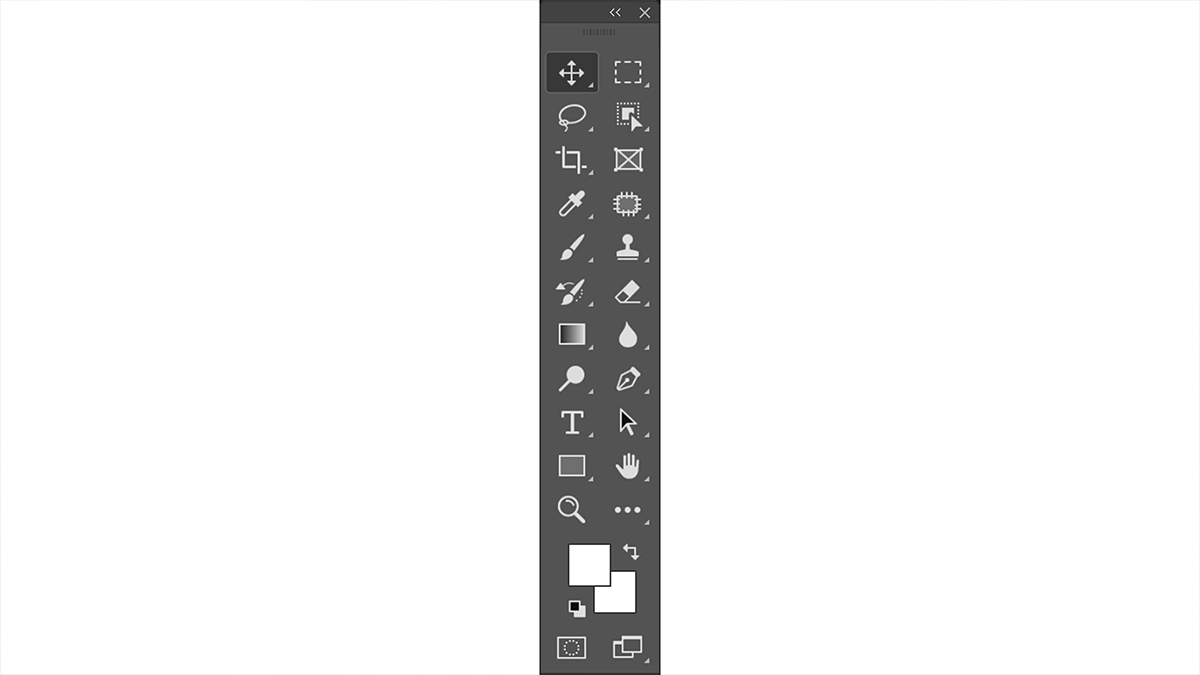
- Toolbar: After that, On the left; provides tools for selection, cropping, painting, retouching, and more.
- Options Bar: Similarly, Below the Menu Bar; displays options for the currently selected tool.
- Panels: Therefore, On the right; includes Layers, Adjustments, Properties, and other panels. You can customize your workspace by rearranging panels.
- Canvas: In other words, The central area where you work on your images.
Basic Tools,
- Move Tool (V): However, Used to move layers or selections.
- Marquee Tool (M): For instance, For rectangular, elliptical, single-row, or single-column selections.
- Lasso Tool (L): For freehand, polygonal, or magnetic selections.
- Quick Selection/Magic Wand Tool (W): Above all, For selecting areas based on color and texture.
- Crop Tool (C): In addition, To trim or straighten an image.
- Brush Tool (B): For painting your image with various brush styles.
- Eraser Tool (E): To erase parts of an image or layer.
- Text Tool (T): To add and edit text.
- Pen Tool (P): For creating precise paths and shapes.
- Zoom Tool (Z): To zoom in and out of your canvas.
Adobe Photoshop Tool Basic Tutorial 2024, Working with Layers,
- Layers Panel: Found on the right side. Layers let you work on different parts of an image separately.
- Creating a New Layer: Click the
Create a new layericon at the bottom of the Layers panel or pressShift+Ctrl+N(Shift+Cmd+N on Mac). - Layer Order: After that, Layers stack on top of each other; the topmost layer appears in front of the others.
- Layer Styles: Add effects like shadows, glows, and bevels by double-clicking a layer and choosing from the Layer Style options.
Basic Image Editing,
- Adjust Brightness/Contrast: Similarly, Go to
Image > Adjustments > Brightness/Contrastto fine-tune lighting. - Adjust Levels: Go to
Image > Adjustments > Levelsto adjust the shadow, mid-tone, and highlight levels. - Adjust Color Balance: Go to
Image > Adjustments > Color Balanceto adjust the colors in your image.
Using Filters,
- Apply a Filter: Go to
FilterChoose a filter in the menu bar (e.g., Blur, Sharpen, Distort). Filters can enhance, stylize, or distort your image. - Smart Filters: Convert your layer to a Smart Object first (
Filter > Convert for Smart Filters) so you can apply filters non-destructively and edit them later.
Adobe Photoshop Tool Basic Tutorial 2024, Text and Shape Tools,
- Add Text: Select the Text Tool (T) and click on the canvas to type. Customize the font, size, and color from the Options Bar.
- Add Shapes: Select the Shape Tool (U), choose a shape (Rectangle, Ellipse, etc.), and draw it on the canvas. Customize the fill and stroke colors in the Options Bar.
Saving Your Work,
- Save as PSD: Go to
File > Save Asand choose Photoshop (PSD) format to preserve layers and settings. - Export as JPEG/PNG: Go to
File > Export > Export Asand choose your desired format and settings.
Adobe Photoshop Tool Basic, Shortcuts to Remember,
- Ctrl+Z: Undo
- Ctrl+T: Free Transform (resize, rotate, and skew objects)
- Ctrl+S: Save
- Spacebar: Hand Tool (for panning around the canvas)
- Ctrl+Alt+Z: Step Backward (multiple undo)
Practice and Explore,
- Tutorials: Check out Adobe’s tutorials on their website or on YouTube for step-by-step guides.
- Experiment: Try different tools and techniques to see how they work.
- Projects: Start with simple projects like photo retouching or creating a poster to build your skills.
In conclusion, If you need more detailed instructions or help with specific features, feel free to ask!
