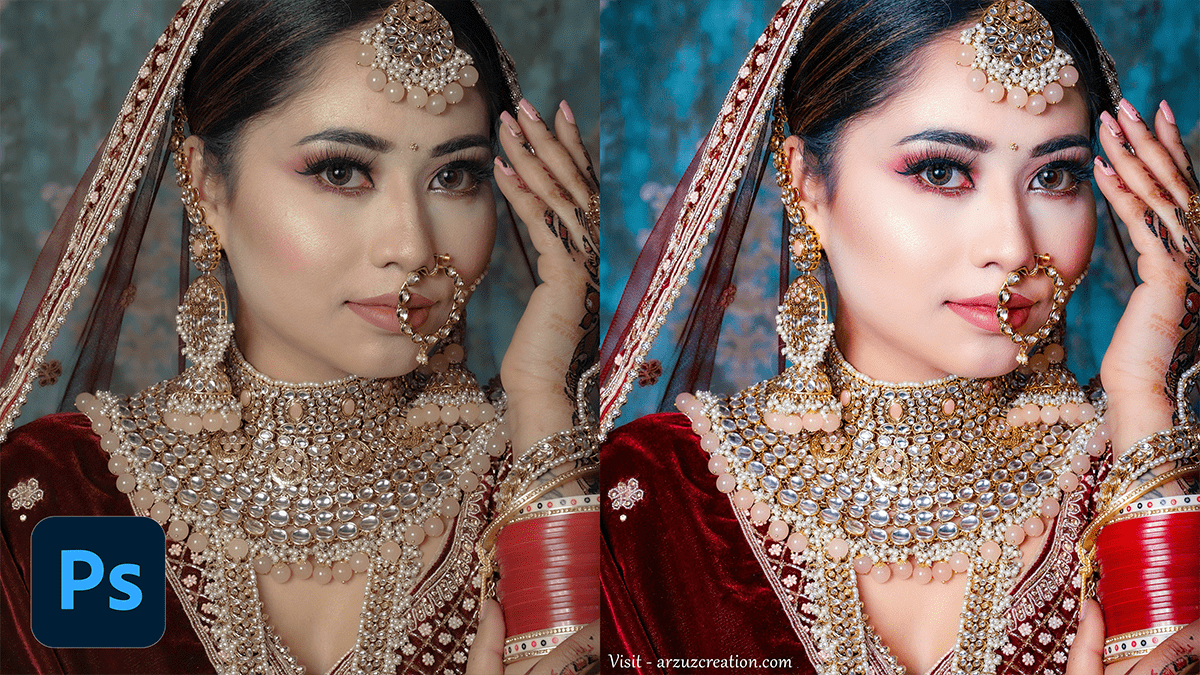
Step-By-Step Wedding Photo Editing in Adobe Photoshop CC 2024,
Therefore, Editing wedding photos in Photoshop involves enhancing the beauty of the images while maintaining a natural, timeless look. In other words, Here’s a step-by-step guide to some of the best methods for editing wedding photos in Photoshop:

Basic Adjustments (Exposure, Contrast, and White Balance):
- Open the Image: Import the wedding photo into Photoshop.
- Camera Raw Filter: Go to
Filter > Camera Raw Filteradjust the exposure, contrast, and white balance. - Correct Exposure: Use the
Exposureslider to brighten or darken the image. - Adjust White Balance: Make sure the whites in the image are neutral, especially if the lighting was off during the shoot.
- Add Contrast: Increase contrast to make the image pop but avoid overdoing it to maintain a soft look.
Skin Retouching:
- Spot Healing Brush: Use the
Spot Healing Brushtool to remove blemishes or minor imperfections on the skin. - Frequency Separation Technique (Advanced): For a smooth and natural look, apply the frequency separation technique. It separates the texture and color layers of the skin, allowing you to retouch the skin texture without affecting the overall skin tone.
- Dodge and Burn: Use the
Dodgetool to lighten areas and theBurntool to darken. This can help sculpt faces and add dimension to features without over-processing.
Step-By-Step Wedding Photo Editing, Enhance Details:
- Sharpening: Apply
Unsharp Mask(Filter > Sharpen > Unsharp Mask) to enhance the details, especially in the wedding dress, hair, or intricate décor. - Clarity Boost: Slightly increase the clarity using the
Camera Raw FilterorHigh Pass Filtermethod for added definition, but avoid too much as it can make the image look harsh.
Color Grading:
- Adjustment Layers: Use
Hue/SaturationorSelective Colorto bring out specific colors (like the bride’s bouquet or the wedding décor). Keep colors soft and cohesive for a romantic feel. - Curves or Levels: Adjust the overall brightness, shadows, and mid-tones using the
CurvesorLevelsadjustment layers to give the image the right mood and contrast.
Step-By-Step Wedding Photo Editing in Adobe Photoshop,
Vignetting:
- Add a Vignette: Create a subtle vignette to focus attention on the couple by going to
Filter > Lens Correction, then under theCustomtab, adjust theVignettesettings.
Background Retouching:
- Content-Aware Fill: If there are any distracting elements in the background, use the
Content-Aware Fillto remove them seamlessly. - Blur Background (Bokeh Effect): If you want to enhance the focus on the couple, use an
Gaussian Bluron the background while keeping the couple sharp. This adds a bokeh-like effect.
Step-By-Step Wedding Photo Editing, Final Touches:
- Color Lookup Table (LUT): Apply a color LUT for a quick and cohesive look. You can find pre-made wedding LUTs that offer pastel tones or warm, romantic vibes.
- Check Highlights: Make sure no important highlights are blown out, particularly in the bride’s dress or sky.
- Finalize Cropping: Make sure the framing of the couple and important elements are perfect, and crop accordingly.

Save in High Quality:
- Export Properly: Save the file as a
.PSDto keep all the layers intact for future edits. Export as.JPEGor.TIFFin the highest quality setting for printing or online sharing.
By keeping the edits natural yet polished, you’ll be able to enhance the beauty of wedding photos without making them look over-processed.