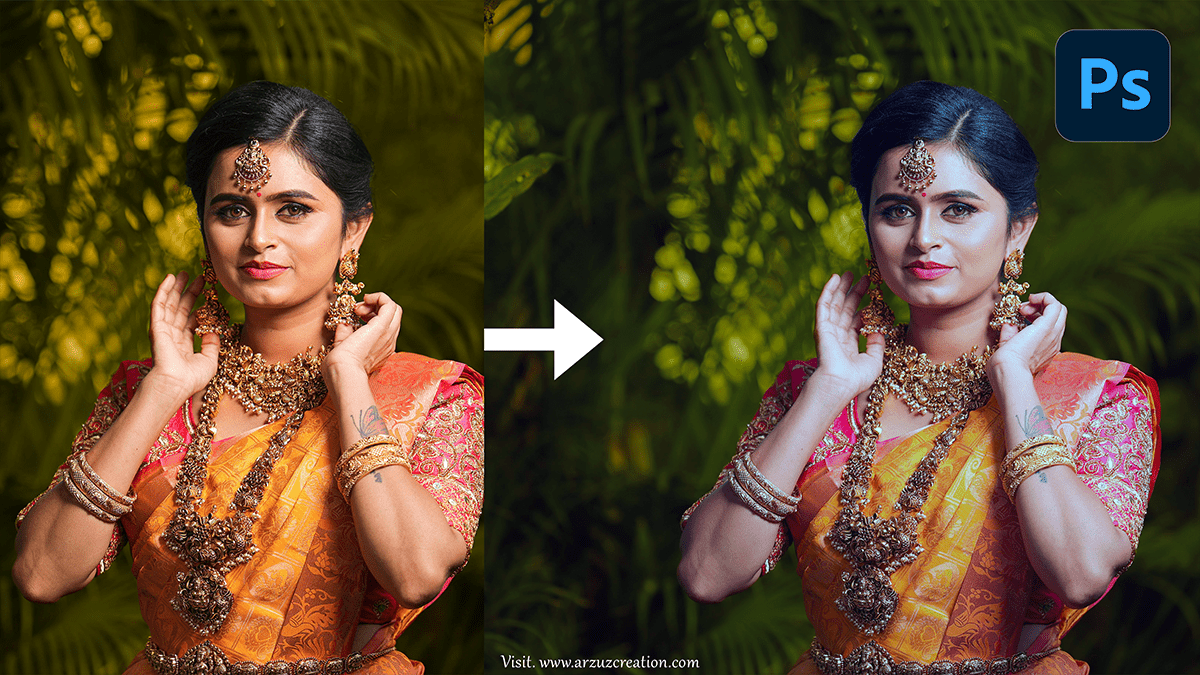
How to Wedding Photo Colour Correction in Photoshop,
Therefore, Color correction in Photoshop for wedding photos involves a few essential steps to ensure the images look natural and vibrant, without overdoing it. In other words, Here’s a simple guide to help you correct colors effectively:

Open the Photo:
- Therefore, Open the wedding photo in Photoshop by navigating to
File>Open, and select the image.
Adjust White Balance:
- Auto Color Correction:
- However, Go to
Image>Auto Tone,Auto Contrast, orAuto Color. Sometimes this automatically balances the image. - Manual White Balance:
- For instance, Create a new
Adjustment Layerby clicking theAdjustment Layericon at the bottom of the Layers panel. - Above all, Select
Curves. - For instance, Use the
White Balance Eyedroppertool within Curves and click on something white or neutral gray in your photo.
How to Wedding Photo Colour Correction, Adjust Exposure:
- In addition, Still, in the Adjustment Layers, add a
LevelsorCurvesadjustment to correct the overall exposure and contrast. - After that, With, drag the
black pointandwhite pointsliders to where the histogram starts. - In addition, you can fine-tune the brightness and contrast by pulling the curve slightly.


Correct Skin Tones:
- Similarly, Go to the
Selective Coloradjustment layer (Layer > New Adjustment Layer > Selective Color). - After that, Choose “Reds” from the drop-down menu.
- Similarly, Adjust the
Cyan,Magenta, andYellowsliders to improve skin tones. Try reducing cyan and increasing yellow and magenta until the skin looks natural.
How to Wedding Photo Colour Correction, and Enhance Vibrancy:
- After that, Add an
Vibranceadjustment layer (Layer > New Adjustment Layer > Vibrance). - Similarly, Increase the
Vibranceto boost the colors without oversaturating them. Be careful with theSaturationslider; too much can make the photo look unnatural.
Fine-Tune Color with Hue/Saturation:
- After that, Add a
Hue/Saturationadjustment layer to make specific color tweaks. For example, reduce the saturation of blues in the sky if they are overpowering or adjust the hue of greens to make foliage look more natural.
How to Wedding Photo Colour Correction in Photoshop,

Final Color Grading:
- Similarly, If you want to add a specific color tone, add an
Color Lookupadjustment layer (Layer > New Adjustment Layer > Color Lookup). - In other words, Choose one of the preset LUTs like “Crisp Warm” or “Film Stock” for a cinematic look.
- Similarly, Adjust the opacity of this layer if it’s too strong.
Save Your Work:
- In conclusion, Once you’re happy with the result, save your work by going to
File>Save As, and choose your desired file format (like JPEG or TIFF).
These steps will help you color-correct your wedding photos while keeping them looking beautiful and natural.
