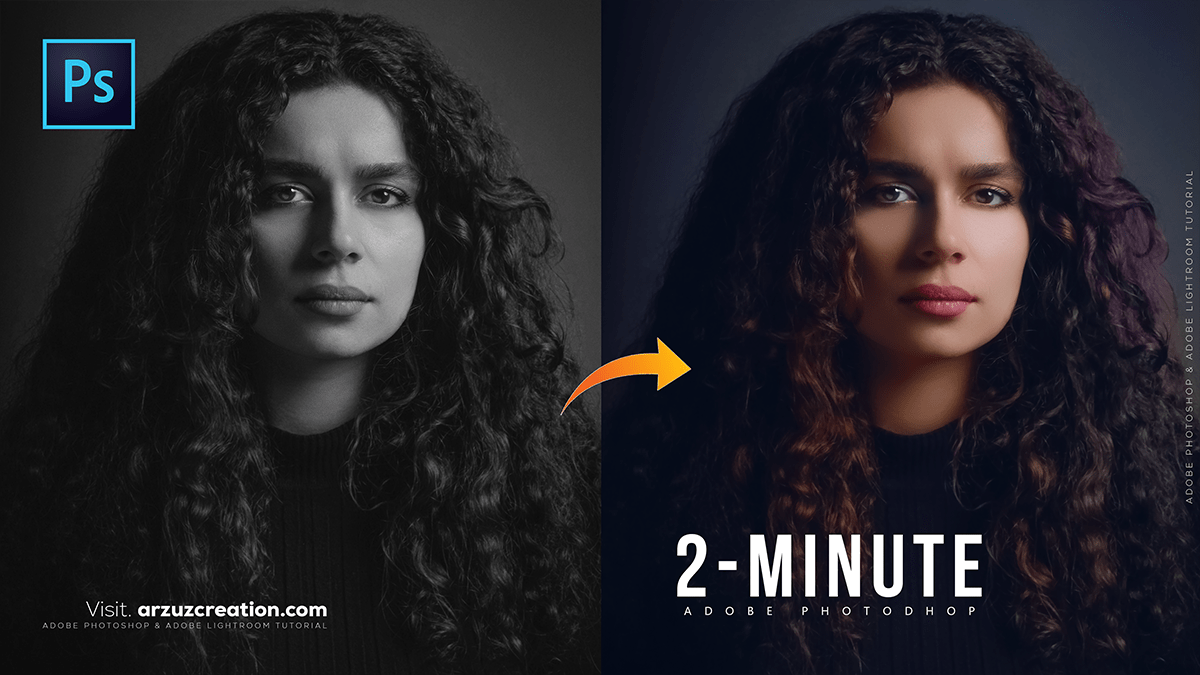
Convert a Black and White Photo to Color in Adobe Photoshop,

Therefore, there are two primary methods to convert a black and white photo to color in Adobe Photoshop: the AI-powered Neural Filter for quick results, and the manual layer-based method for precise control.
Convert a Black and White Photo to Color in Adobe Photoshop,
1. Using the Colorize Neural Filter (Recommended for Speed)
Therefore, this method uses machine learning to automatically apply realistic colors.
- Import Image: Open your black and white photo in Adobe Photoshop.
- Access Neural Filters: Go to the menu bar and click Filter > Neural Filters.
- Enable Colorize: In the Neural Filters panel, find the Colorize filter. If it’s your first time, you may need to click the download button.
- Activate: In other words, click the toggle button to activate the filter. Photoshop will automatically analyze and colorize your image.
Convert a Black and White Photo to Color in Adobe Photoshop,
- Adjust Colors (Optional):
- Therefore, to change the color of a specific area (like a coat or the sky), click that area in the Neural Filter panel’s small viewer to create a Focal Point.
- However, select a new color from the Color Picker.
- In other words, use the Saturation and the Cyan/Red, Magenta/Green, and Yellow/Blue sliders for global adjustments to achieve more realistic hues.
- Output: Therefore, select Smart Object or New Layer as the Output to keep your original image untouched.
- Refine Details (Optional): If the AI missed some spots or made mistakes, you can use the Brush Tool with the layer mask (if you chose Smart Object or New Layer) to manually refine the colorization.
2. Using the Manual Layer-Based Method (Recommended for Control)
In other words, this traditional method offers the highest level of detail and control by using adjustment layers.
- Preparation: Open your image in Photoshop and make any necessary restorations (removing scratches, adjusting contrast, etc.).
- Create a Color Layer:
- However, create a New Layer above your photo layer.
- Above all, change the Blending Mode of this new layer to Color.
- Colorize an Area (e.g., Skin):
- Above all, select the Brush Tool (B) and choose a color (e.g., a skin tone).
- However, Brush over the area you want to color. Since the layer is set to the Color blending mode, it will apply the hue and saturation of your chosen color while retaining the luminosity of the black and white image underneath.
Convert a Black and White Photo to Color in Adobe Photoshop,
- Refine the Color:
- However, with the colored layer selected, go to Image > Adjustments > Hue/Saturation (or add a Hue/Saturation Adjustment Layer and clip it to the color layer).
- Above all, adjust the Hue, Saturation, and Lightness until the color looks natural.
- Repeat for all Areas:
- However, create a New Layer for each distinct color/area (e.g., one for the sky, one for clothes, one for hair) and repeat steps 2-4. This keeps your colors organized and allows for independent edits.
- Above all, consider grouping layers for different elements (e.g., a “Skin” Group).
