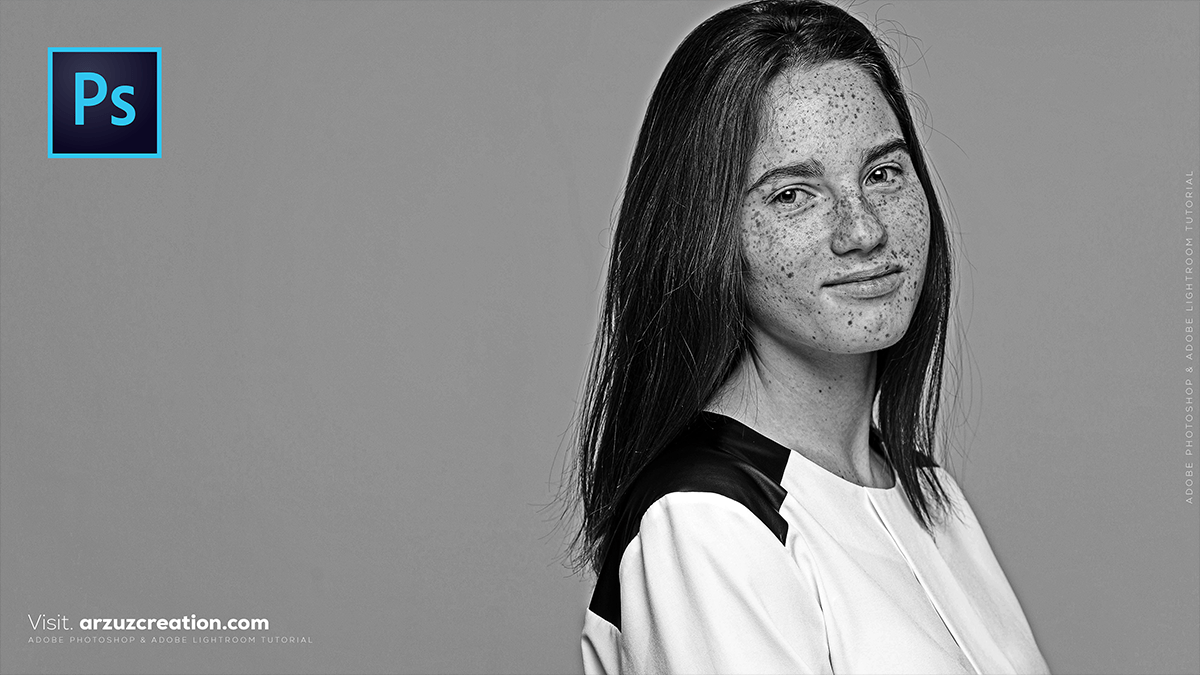
Professional Black and White Portrait Look in Adobe Photoshop,
Therefore, achieving a professional black-and-white (B&W) look in Photoshop is about more than just desaturating. A “pro” look requires controlling the luminosity of specific colors, managing local contrast, and maintaining skin texture.
In other words, here is a professional workflow to transform your portraits.

Professional Black and White Portrait Look in Adobe Photoshop,
1. The “Better” Conversion: Black & White Adjustment Layer
Therefore, never use Image > Mode > Grayscale. It discards data. Instead, use an adjustment layer to maintain control over the tones.
- Therefore, Go to Layer > New Adjustment Layer > Black & White.
- The Secret: Use the targeted adjustment tool (the little finger icon in the Properties panel). Click on the skin in your image and drag left or right. Usually, dragging Reds and Yellows to the right will brighten and “smooth” the skin, while dragging them left adds dramatic grit.
2. Add Depth with “Soft Light” Contrast
Therefore, For that high-end editorial “pop,” use this blending mode trick:
- In other words, Press
Ctrl + J(Win) orCmd + J(Mac) to duplicate your original color layer. - Therefore, move this layer below your Black & White adjustment layer.
- In other words, change its Blending Mode to Soft Light.
- Therefore, lower the Opacity to around 20–40%. This creates deep blacks and bright highlights without losing detail.
Professional Black and White Portrait Look in Adobe Photoshop,
3. Targeted Dodging and Burning
In other words, Professional B&W portraits thrive on “sculpting” with light.
- However, create a new layer and go to Edit > Fill, choosing 50% Gray. Set this layer to Overlay.
- In other words, use a low-opacity Brush (10%) with White to “Dodge” (brighten) the iris of the eyes, the bridge of the nose, and cheekbones.
- However, switch to Black to “Burn” (darken) the jawline, hair, and edges of the frame to draw focus to the face.
4. The “Pro” Finish: Grain and Sharpening
However, Digital B&W can look too “clean” or plastic. Adding texture makes it feel like film.
- Add Grain: Go to Filter > Camera Raw Filter. Under the Effects tab, increase Grain. For a professional look, keep the Size to all but the Roughness moderate.
- High Pass Sharpen: However, To make the eyes and eyelashes “tack sharp,” duplicate your layer, go to Filter > Other > High Pass, set it to 1.5 pixels, and change the blending mode to Overlay. Use a Layer Mask to paint this effect only on the eyes and lips.
Professional Black and White Portrait Look in Adobe Photoshop,
Quick Comparison Table: Conversion Methods
| Method | Control Level | Best For… |
| B&W Adjustment | High | Controlling skin tones and clothing separation. |
| Gradient Map | Moderate | Fast, high-contrast “silky” looks. |
| Channel Mixer | Very High | Replicating specific film stocks (e.g., Tri-X 400). |
In conclusion, would you like me to walk you through how to use Channel Mixing to specifically mimic a vintage film look?
