Adobe Photoshop 2026: Moody Forest Colour Grading Tutorial,

Adobe Photoshop 2026: Moody Forest Colour Grading Tutorial,
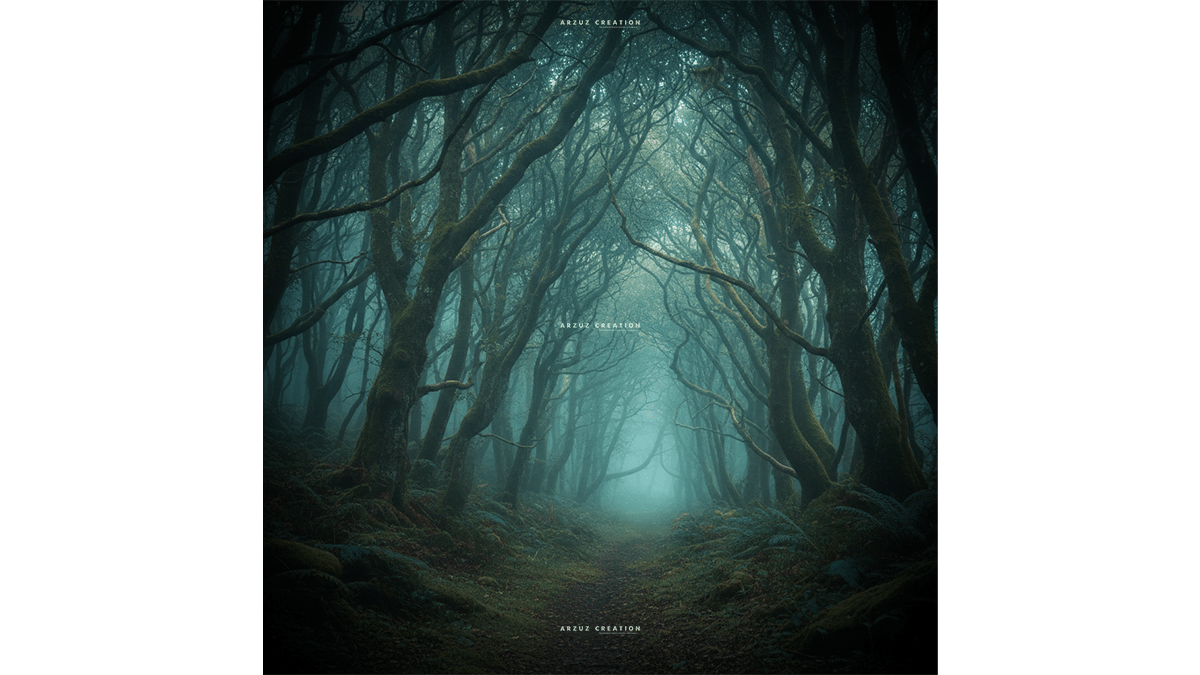
Therefore, to achieve a Moody Forest look in Photoshop 2026, you want to shift away from bright, cheerful greens and toward a desaturated, cool-toned, and high-contrast atmosphere.
In other words, here is a step-by-step workflow using the 2026 toolset:
1. The “Base Chill” (New Adjustment Layer)
Therefore, instead of starting with Exposure, start with the new Color and Vibrance Adjustment Layer to set the temperature.
Cool it down: In other words, slide the Temperature toward the blue side. This removes the “sunny” warmth and makes the forest feel damp and misty.
Desaturate: Above all, lower the Vibrance (not Saturation) by about -25. This keeps the colors subtle without making the image look gray.
2. Deepen the Shadows (The Curves “S” Lift)
Therefore, A hallmark of the moody look is “crushed” but “lifted” blacks.
Therefore, create a Curves layer.
In other words, create an S-Curve: Bring the middle down to darken midtones, but click the bottom-left point (the absolute blacks) and drag it slightly upward.
Effect: Therefore, this makes the shadows very dark but gives them a “faded” or matte charcoal look rather than pure black.
Adobe Photoshop 2026: Moody Forest Colour Grading Tutorial,
3. Shift the Greens (The “Earthy” Grade)
In other words, Forest greens in moody photos should lean toward emerald or teal, not yellow.
In other words, open the Hue/Saturation layer or the Calibration tab in Camera Raw.
Yellows: Shift the Hue toward Green.
Greens: Shift the Hue toward Cyan.
Luminance: Above all, lower the brightness of the greens. Dark leaves create more mystery than bright ones.
4. AI Fog & Atmosphere
In other words, Photoshop 2026’s Generative Fill (Nano Banana) is incredible for adding depth to forests.
However, use a large, soft Lasso selection around the background trees.
Type: "Thin, moody forest mist, low opacity."
Why: This adds physical separation between your subject and the deep woods, creating that “eerie” scale.
5. Local Lighting (The “Spotlight” Effect)
However, Moody’s photos work best when the viewer’s eye is guided.
However, use the Selection Brush Tool (new for 2026) to quickly paint over your subject or a path.
Above all, Invert the selection and add a Brightness/Contrast layer to darken everything except your subject.
However, add a heavy Vignette to close in the edges of the frame.
Adobe Photoshop 2026: Moody Forest Colour Grading Tutorial,
Quick Settings Cheat Sheet
| Adjustment | Suggested Value | Result |
| Temperature | -10 to -20 | Cold, damp atmosphere |
| Vibrance | -30 | Muted, professional tones |
| Shadows (Curves) | Lift the bottom point | Matte, “Instagram-style” blacks |
| Green Hue | +20 (toward Cyan) | Removes “Neon” grass look |
| Clarity | -10 | Dreamy, soft glow (Orton Effect) |
Would you like me to generate a “Moody Forest” prompt for you to use with Generative Fill to see how the AI handles the lighting?
