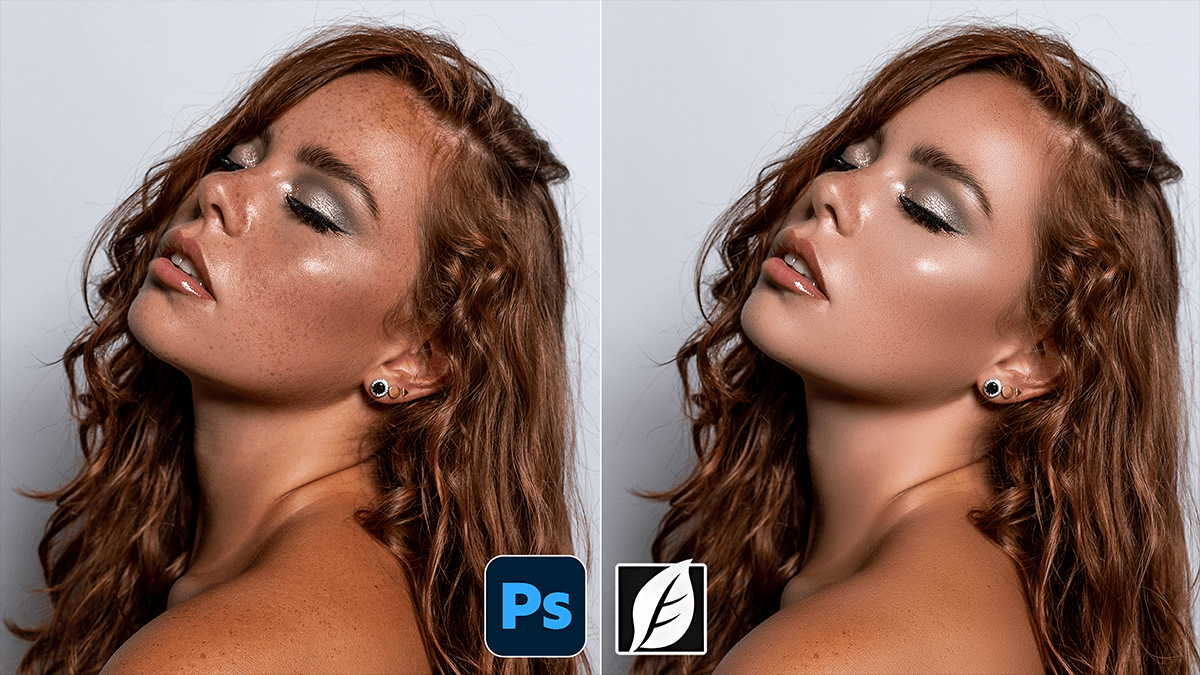
Remove Skin Blemishes Using Photoshop Plugin SkinFiner 5.7.1,

Therefore, if you’re looking to streamline your portrait editing, SkinFiner is a popular choice because it functions as both a standalone app and a Photoshop plugin. It’s designed to automate the tedious parts of skin retouching while maintaining a realistic texture.
Remove Skin Blemishes Using Photoshop Plugin SkinFiner 5.7.1,
Here is how you can effectively use SkinFiner to remove blemishes and smooth skin within Photoshop.
Launching SkinFiner in Photoshop:
Therefore, before you start, ensure you aren’t working directly on your “Background” layer. This keeps your edits non-destructive.
Duplicate your layer: Press. Ctrl+J (Windows) or Cmd+J (Mac).
Open the Plugin: Therefore, Go to Filter > SkinFiner > SkinFiner… ## 2. Automatic MaskingSkinFiner’s “magic” lies in its ability to automatically identify skin tones.
Check the Mask: However, use the Mask panel to see what the software has selected (usually shown in red).
Refine: If it’s picking up hair or clothing, use the Skin Mask Brush (the minus icon) to paint away areas you don’t want softened.
Color Range: Therefore, adjust the Hue, Saturation, and Luminance sliders if the initial selection missed some skin areas.
Remove Skin Blemishes Using Photoshop Plugin SkinFiner 5.7.1,
3. Smoothing & Blemish Removal:
Therefore, once the mask is set, move to the Smoothing panel:
Fine vs. Medium/Coarse: Therefore, adjust these sliders to target different levels of skin texture. To remove small blemishes and pores, focus on Fine. To even out blotchiness, use Medium.
Texture Recovery: However, one of SkinFiner’s best features is the “Texture” slider. Crank it up slightly to ensure the skin doesn’t look like “plastic.”
Localized Healing: Therefore, while SkinFiner is great for overall smoothing, large acne or scars are often best handled first with Photoshop’s native Healing Brush or Remove Tool before launching the plugin.
4. Color & Tone Adjustments:
Therefore, Retouching isn’t just about texture; it’s about tone.
Skin Tone: However, use the Skin Color section to fix redness (common in noses and cheeks) or to add a “healthy glow” (warmth).
Brightness/Contrast: Adjust these within the plugin to make the skin “pop” against the background.
Remove Skin Blemishes Using Photoshop Plugin SkinFiner 5.7.1,
Pro-Tip: The “Less is More” Rule:
Therefore, High-end retouching should be invisible. I recommend setting your Opacity slider in the SkinFiner interface to about 70-80% rather than 100%. This allows some of the natural skin character to peek through, preventing that “uncanny valley” look.
Would you like me to walk you through how to use Photoshop’s native “Neural Filters” as an alternative to SkinFiner?
