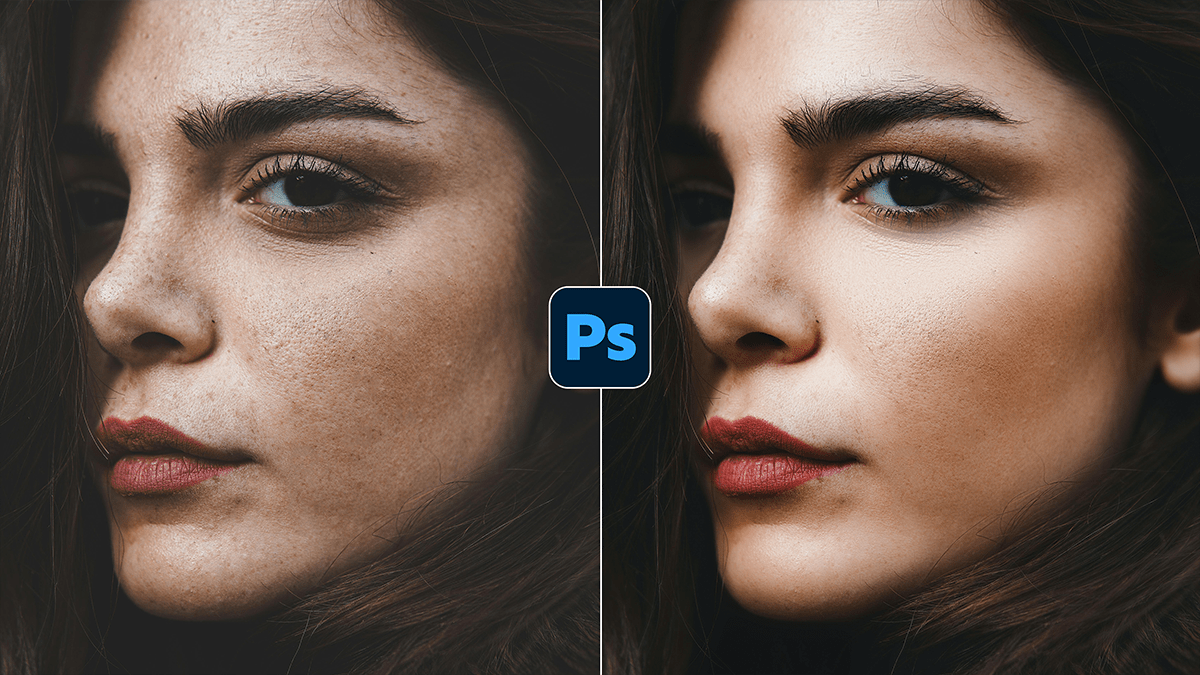
Professional Skin Retouching Adobe Photoshop Tutorial 2026,

Therefore, Skin retouching is a balancing act. The goal is to remove distractions while preserving the natural texture of the skin (the “pores”). If you go too far, you end up with the dreaded “uncanny valley” plastic look.
Professional Skin Retouching: Adobe Photoshop Tutorial 2026,
In other words, here is the industry-standard workflow for achieving high-end results.
1. The Clean-Up Phase:
Therefore, before diving into complex techniques, address the obvious blemishes.
Tool: However, the Healing Brush Tool or the Spot Healing Brush.
Method: Create a new blank layer named “Clean Up.” Set your brush to Sample: Current & Below.
Goal: Therefore, remove temporary distractions like acne, stray hairs, or dust spots. Leave permanent features like beauty marks unless specifically asked to remove them.
2. Frequency Separation (The Industry Standard)
Therefore, this technique splits your image into two layers: Low Frequency (Colors and Tones) and High Frequency (Texture). This allows you to smooth out blotchy skin without blurring the pores.
| Layer | Content | Adjustment Goal |
| High Frequency | Fine details, pores, hair, wrinkles | Use the Clone Stamp to fix texture issues. |
| Low Frequency | Skin tones, shadows, highlights | Use the Lasso Tool + Gaussian Blur to smooth transitions. |
Professional Skin Retouching Adobe Photoshop Tutorial 2026,
How to set it up:
In other words, duplicate your clean-up layer twice. Name the top one Texture and the bottom one Color.
For Color: However, Apply a Gaussian Blur. Choose a radius where the skin texture just disappears, but features remain recognizable.
For Texture: Go to Image > Apply Image.
Set Layer to “Color.”
Blending: Subtract.
Scale: 2, Offset: 128.
In other words, change the Texture layer’s Blending Mode to Linear Light.
3. Local Dodge & Burn:
However, this is the “secret sauce” of high-end fashion photography. It involves micro-adjusting the brightness of specific pixels to even out skin tone.
Setup: Create two Curves adjustment layers. Name one “Dodge” (brighten) and one “Burn” (darken). Invert their masks to black.
The Process: Using a very soft white brush at 1–3% Opacity, paint over dark patches to brighten them (Dodge) and bright highlights to pull them back (Burn).
Why it works: It preserves 100% of the original skin texture because you aren’t “smudging” anything; you’re just changing the light.
Professional Skin Retouching Adobe Photoshop Tutorial 2026,
4. Final Touches:
Color Grading: Use a Selective Color or Hue/Saturation layer to fix “redness” (common in noses and ears).
Grain: Sometimes adding a tiny amount of monochromatic noise ($1\text{–}2\%$) at the very end helps unify the retouching and makes it look like authentic film/sensor data.
Pro Tip: Always zoom out to 25% or 50% frequently. If you spend too much time zoomed in at 200%, you’ll lose perspective and over-edit.
Would you like me to walk you through the specific Apply Image settings for 16-bit images, or should we move on to how to color-grade the skin?
