Photoshop Tutorial Portrait Beauty Retouching Photo Editing,

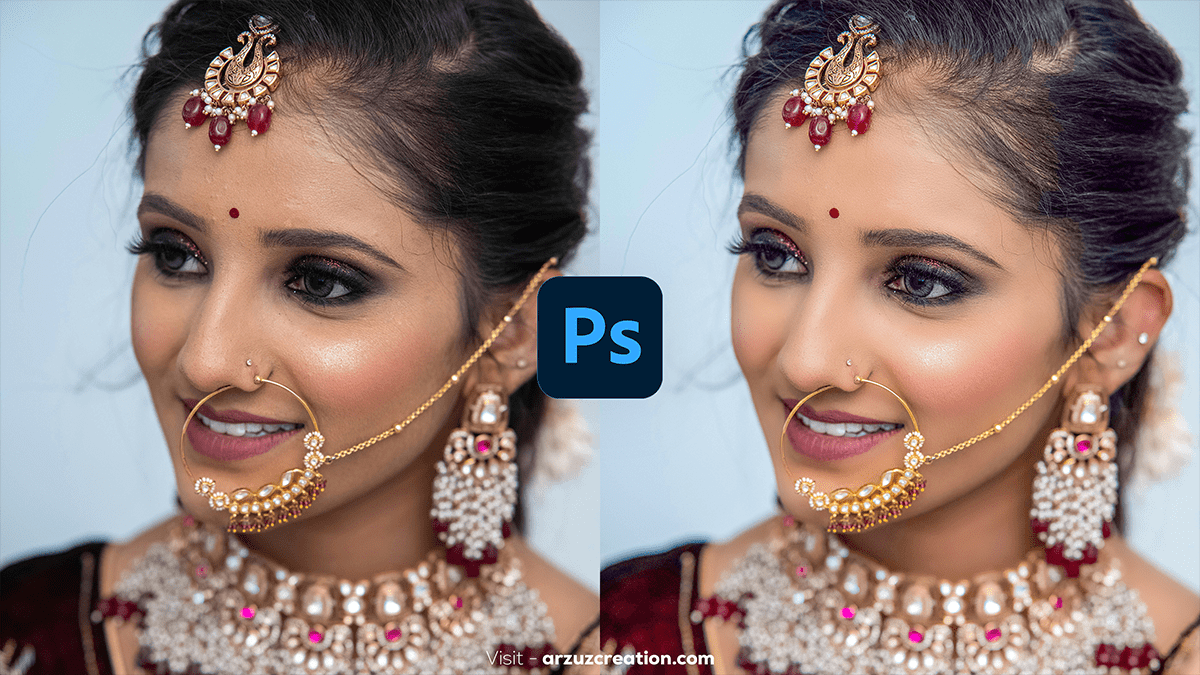
Beauty retouching in Photoshop involves enhancing a portrait while maintaining a natural look. Therefore, Here’s a step-by-step tutorial:
Open Your Image:
In other words, Open the picture you want to edit in Photoshop.
Photoshop Tutorial Portrait Beauty Retouching, Duplicate the Layer:
However, Press Ctrl + J (Windows) or Cmd + J (Mac) to duplicate the background layer. This preserves the original image in case you need to revert.
Photoshop Tutorial Portrait Beauty Retouching, Skin Smoothing:
Create a Frequency Separation:
- For instance, Duplicate the layer twice (
Ctrl + Jtwice). Name the first copy “Low Frequency” and the second “High Frequency.” - Above all, Turn off the visibility of the “High Frequency” layer.
- In addition, Select the “Low Frequency” layer, go to
Filter>Blur>Gaussian Blur. Blur until you see a smooth version of the image without details (around 5-10 pixels). - After that, Select the “High Frequency” layer, turn it on, and go to
Image>Apply Image. - Set the layer to “Subtract” if you’re on 8-bit or “Add” for 16-bit images. Set the scale to 2 and offset to 128 for 8-bit images.
- Change the blending mode of the “High Frequency” layer to
Linear Light.
Remove Blemishes:
On the “High Frequency” layer, use the Clone Stamp Tool (S) or Spot Healing Brush Tool (J) to remove blemishes and imperfections.
Smooth Skin Texture:
On the “Low Frequency” layer, use the Lasso Tool (L) to select areas of skin. Apply a slight Gaussian Blur (around 3-6 pixels) to smooth the skin while retaining its natural texture.
Photoshop Tutorial Portrait Beauty Retouching Photo Editing,

Enhance the Eyes:
Brighten the Whites:
- Create a new layer, set the blending mode to, and use a soft white brush to paint over the whites of the eyes.
- Reduce the opacity of the layer if needed.
Sharpen the Iris:
- Duplicate the “High Frequency” layer, apply a
High Pass Filter(Filter>Other>High Pass) with a radius of around 1-2 pixels. - Change the blending mode to
Overlayand use a layer mask to apply it only to the irises.
Enhance Lips:
- Create a new layer, set the blending mode to, and use a soft brush to add color to the lips.
- Reduce opacity for a natural look.
Portrait Beauty Retouching, Dodge, and Burn:
- Please create a new layer, fill it with 50% gray, and set the blending mode to
Overlay. - Use the
Dodge Toolto brighten theBurn Toolto darken areas to add depth to the face.
Adjust Color and Tone:
- Use
CurvesorLevelsadjustment layers to fine-tune the contrast and brightness. - Use
Hue/Saturationto adjust the overall color balance.
Portrait Beauty Retouching, Final Touches:
- Add any final touches like sharpening the overall image (
Filter>Sharpen>Unsharp Mask). - Save your work.
This process will give you a professionally retouched portrait while keeping the subject’s natural beauty intact.
