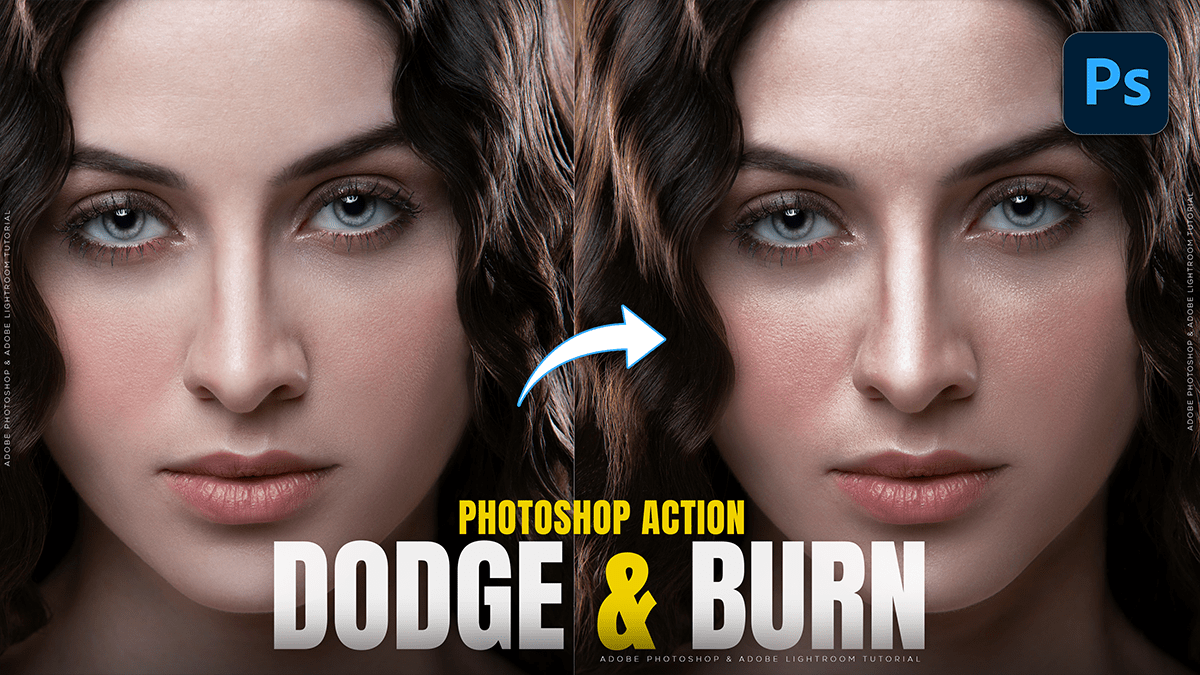
Adobe Photoshop 2026: How to Create Dodge and Burn,
Therefore, in Adobe Photoshop 2026, dodging (lightening) and burning (darkening) can be done using several methods, ranging from classic tools to modern non-destructive workflows.

Adobe Photoshop 2026: How to Create Dodge and Burn,
Therefore, while the basic Dodge and Burn tools in the toolbar are easy to use, they are “destructive” because they change the pixels of your original image. For professional results, most editors prefer non-destructive methods using layers.
Method 1: The 50% Gray Layer (Most Popular)
This is the standard professional approach. It allows you to see exactly where you’ve painted and adjust the intensity later.
- Create a New Layer: Therefore, Hold
Alt(Win) orOption(Mac) and click the New Layer icon in the Layers panel. - Configure Settings: In the dialog box that pops up:
- Name: “Dodge and Burn”
- Mode: Change to Overlay (for punchy contrast) or Soft Light (for subtle blending).
- Check: “Fill with Overlay-neutral color (50% gray).”
- Paint: Therefore, select a soft Brush Tool (B). Set your foreground color to White to Dodge or Black to Burn.
- Tip: Set your Brush Opacity to a low value (around 5–15%) to build up the effect gradually.
Adobe Photoshop 2026: How to Create Dodge and Burn,
Step 2: Curves Adjustment Layers (Maximum Control)
Therefore, this method is highly precise because you can go back and change the brightness of the curves at any time.
- Dodge Layer: Therefore, create a Curves adjustment layer and pull the middle of the curve upward to brighten the image.
- Burn Layer: Create a second Curves layer and pull the curve downward to darken it.
- Invert Masks: Select the white mask on each layer and press
Ctrl+I(Win) orCmd+I(Mac) to turn it black (hiding the effect). - Paint to Reveal: Use a soft white brush on the black masks to “paint in” the highlights or shadows where needed.
Method 3: The Adjustment Brush (2026 Feature)
Therefore, the Adjustment Brush Tool is a newer, more intuitive way to apply local adjustments like dodge and burn.
- In other words, select the Adjustment Brush Tool from the toolbar.
- In the tool options bar, set the adjustment type to Brightness/Contrast or Exposure.
- Dodge: Above all, increase the brightness in the tool settings and paint over the areas you want to highlight.
- Burn: Create a new adjustment with decreased brightness to paint in shadows.
- Photoshop 2026 automatically creates the adjustment layer and mask for you as you paint.
Adobe Photoshop 2026: How to Create Dodge and Burn,
Pro Tips for 2026:
- Pen Pressure: In other words, if you use a tablet, enable pen pressure for Opacity in the brush settings to control the “flow” of light and shadow naturally.
- Luminosity Masks: To prevent your “burning” from making dark shadows look muddy, use the Apply Image command on your mask to restrict the effect only to specific tonal ranges.
- Check Layer: In other words, create a temporary Black & White adjustment layer on top of your stack. This helps you focus purely on the luminosity (values) without being distracted by color.
In conclusion, would you like me to walk you through how to create a “Check Layer” to see your values more clearly while you work?