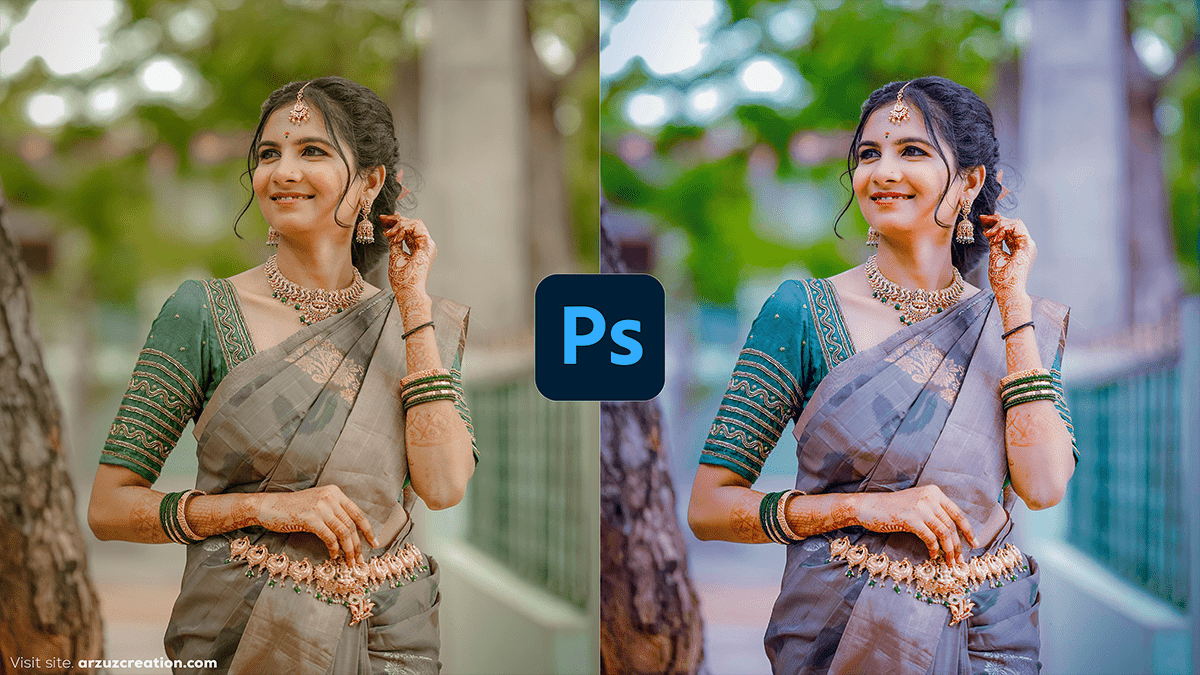
Adobe Photoshop 2024: Wedding Photo Editing Color Grading,

Therefore, Color grading wedding photos in Photoshop involves enhancing the mood and emotions of the event by adjusting the overall color tones. Wedding photography often aims to create a soft, romantic, and timeless look. In other words, here’s a simple guide to help you with color grading in Photoshop for wedding photos:
Step-by-Step Guide to Color Grading Wedding Photos in Photoshop:
1. Open Your Photo in Photoshop:
In other words, open the image you’d like to color grade.
2. Basic Adjustments with Camera Raw Filter (Optional):
In other words, if your image is a RAW file, you’ll automatically start in Adobe Camera Raw. For JPEG images, you can apply the Camera Raw Filter by going to Filter > Camera Raw Filter.
Exposure: Adjust the exposure to ensure your image is neither too dark nor too bright.
White Balance: Set the correct white balance. Use the eyedropper tool to click on something neutral in the image (such as a white dress or a grey object). Wedding photos often benefit from a slightly warmer temperature to create a romantic mood.
3. Create a New Adjustment Layer – Curves:
In other words, go to Layer > New Adjustment Layer > Curves.
However, use the curves tool to adjust the brightness and contrast.
For instance, pull the shadows slightly down and the highlights slightly up to add contrast. You can also tweak individual color channels (Red, Green, Blue) to fine-tune color tones.
4. Color Balance Adjustment:
In other words, go to Layer > New Adjustment Layer > Color Balance.
However, in the Shadows, Midtones, and Highlights, adjust the sliders to give the photo a specific color tint.
For warm tones: Add more red and yellow to the highlights and midtones.
For a more cinematic, teal-orange look: Add blue/cyan to the shadows and yellow/orange to the highlights.
5. Selective Color for Fine-Tuning:
However, Go to Layer > New Adjustment Layer > Selective Color.
For instance, choose specific color ranges (e.g., reds, whites, blacks) and adjust their Cyan, Magenta, Yellow, and Black sliders to balance and enhance the colors in the photo.
However, you might want to soften the whites or add a slight tint to the blacks for a more cinematic feel.
Adobe Photoshop 2024: Wedding Photo Editing Color Grading,

6. Use Gradient Map for a Stylized Look:
For instance, go to Layer > New Adjustment Layer > Gradient Map.
Above all, set the Blending Mode of the gradient map layer to Soft Light or Overlay and reduce the opacity (to around 10-30%) to give the image a soft, matte color grade.
In addition, for a soft, warm look, use gradients with a combination of warm tones (like peach and soft pinks).
7. Add a Vignette for Focus:
For instance, go to Filter > Lens Correction, select the Custom tab, and under Vignette, darken the edges slightly. This draws the viewer’s attention towards the center of the image.
8. Final Touches – Dodge and Burn:
Above all, create a new layer, fill it with 50% gray, and set the blending mode to Overlay.
In addition, use the Dodge tool (for highlights) and the Burn tool (for shadows) to add more depth to the image. This can highlight key elements like the bride’s dress or the groom’s suit.
9. Export:
Above all, once you’re happy with the color grading, export the photo by going to File > Export > Export As.
Tips for Wedding Photos:
Warm tones: Enhance the emotion by adding warm tones, which give a romantic and inviting feel.
Soft contrast: Keep the contrast on the softer side, keeping the photo elegant and timeless.
Subtle color tones: Avoid harsh color shifts. Wedding photos often benefit from subtle, dreamy colors.
Let me know if you’d like further adjustments or tips for your wedding photos!
