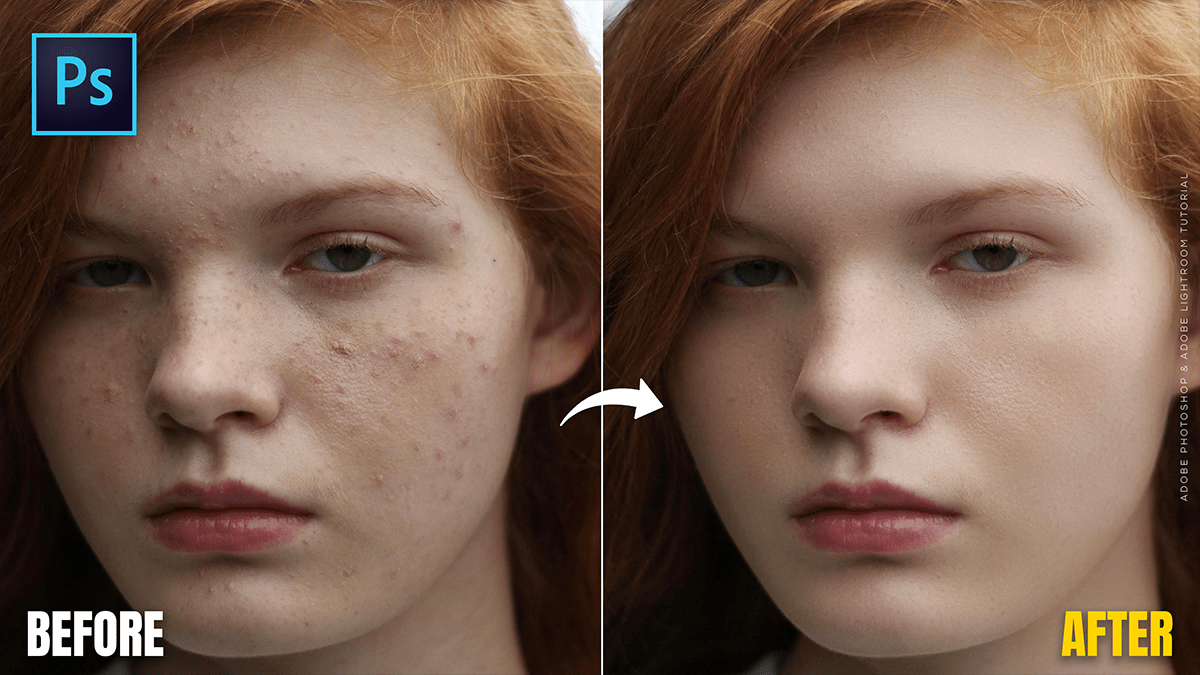
Adobe Photoshop 2026: Skin Retouching Tutorial For Beginners,

Therefore, in 2026, skin retouching in Photoshop has shifted heavily toward AI-automated workflows, though professional “Frequency Separation” remains the gold standard for high-end results.
Adobe Photoshop 2026: Skin Retouching Tutorial For Beginners,
Therefore, the current landscape for Photoshop 2026 (Version 27.x) includes powerful built-in AI filters, though some users have noted technical bugs in early 2026 releases that require specific updates to fix.
1. The AI Approach (Fastest)
Therefore, the Neural Filters panel is the primary hub for quick skin work.
Skin Smoothing Filter: This AI-powered tool automatically detects faces and smooths the skin while preserving texture.
How to use: Go to Filter > Neural Filters > Skin Smoothing.
Controls: Therefore, use the “Blur” slider to reduce spots and the “Smoothness” slider to level out skin tones.
Note: Therefore, if you see a “temporarily disabled” error (common in early 2026 builds), ensure you have updated to version 27.2 or higher.
Adobe Photoshop 2026: Skin Retouching Tutorial For Beginners,
2. The Professional Standard: Frequency Separation
Therefore, for high-end commercial work that requires preserving every pore while removing redness or blotchiness, this manual technique remains the best.
The Concept: Therefore, you split the image into two layers:
Low Frequency: Contains the colors and tones (blurred).
High Frequency: Contains the texture and fine details (sharp).
2026 Update: Therefore, Many pros now use Smart Objects for Frequency Separation, allowing you to go back and adjust the blur radius even after you’ve started retouching.
3. Top Tools & Plugins for 2026
Therefore, if the built-in AI isn’t enough, these third-party tools are leading the industry this year:
Tool | Best For | Key Feature |
Retouch4me | Automation | Uses AI to “Dodge & Burn” automatically without the plastic look. |
| Portraiture 4 | Workflow Speed | The classic plugin, updated for better 2026 hardware acceleration. |
| Remove Tool | Blemishes | The AI-powered “Remove Tool” in the toolbar has replaced the Spot Healing Brush for many users, as it better understands context. |
Adobe Photoshop 2026: Skin Retouching Tutorial For Beginners,
4. Quick Tips for Natural Results
Check Opacity: Never leave a retouching layer at 100%. Dropping it to 70-80% brings back just enough “imperfection” to make the photo look real.
Use the “Remove” Tool: For stray hairs or pimples, the 2026 Remove Tool (found in the Healing Brush group) is significantly more accurate than the old Spot Healing tool.
Dodge & Burn: Instead of blurring skin, use a 1% flow brush on a 50% Gray layer (Overlay mode) to lighten dark spots. This preserves 100% of the original skin texture.
Would you like me to walk you through a step-by-step tutorial for setting up a Frequency Separation action?
